
Like most of you reading this, I do not have an acoustically treated, dedicated recording room like you would find in a pro recording studio. All my recording takes place in a small, ordinary room in my house, that is also used for many other activities.
This can throw up a few challenges when recording, especially with vocals. I’ve never let this stop me from making music though. You can turn most small rooms into a perfectly acceptable recording room, if you spend a little bit of time carefully setting up before you press the big red record button.
If you’re lucky enough to have a choice of rooms to record in, then you should definitely check out my article on selecting the best place to record at home.
Follow the 11 tips in this guide to get the best results when recording vocals in a small room…
If you are interested in checking out the best recording gear such as audio interfaces, studio monitor speakers, microphones, etc., you can find them at Amazon by clicking here.
1 Put soft furnishings & fabrics in your room
Generally, the biggest problem with rooms in a normal house, especially small rooms, comes from reflections.
When you are recording vocals, you might think all that the microphone captures is the sound coming directly from the singer’s mouth. Unfortunately, sound waves don’t work quite as simply as that. Sound projects outwards from the singer in all directions, not just toward the microphone.
The sound in turn reflects back from any hard surfaces in your room such as walls, furniture, the ceiling, the door, etc., and goes back into the microphone. These sounds will have different characteristics depending on how far they’ve traveled, how much sound has been absorbed, what frequency the sound is, etc.
Often, they do not sound very pleasant, they can combine in ways that emphasize unwanted frequencies, and have a real chance of ruining the recording. In a small room the effect can be increased; the reflections do not have very far to travel so do not lose much energy before they hit our microphone.
What on earth has that got to do with soft furnishings and fabrics?
Soft furnishings and fabrics such as duvets, cushions, pillows, blankets, carpets, curtains/drapes, etc. absorb sound. This means you can use them to massively reduce the amount of reflections coming from the room and into the microphone.
This is why bedrooms can make great vocal recording rooms; they are usually full of soft furnishings that soak up the sound before it has the chance to reflect back into our mic and potentially ruin our recording.
Consider doing the following when setting up your small room for vocal recording…
- If you don’t have carpet, get a large, thick rug to place on the floor
- Hang curtains/drapes and close them during recording
- Put soft stuff behind the singer’s head when singing e.g. coats, duvets, blankets, cushions (I heard of one person say he actually takes the mattress off the bed and puts it behind him when singing, and gets very clean vocal recordings!)
- Place cushions, blankets, duvets, big coats, etc. strategically around the room
Whatever the contents of your room, you will need a good audio interface. I have been using Focusrite Scarlett interfaces for years, and they have always given me great sounding recordings for not very much money. You can buy the Focusrite Solo from Amazon (affiliate link) for a very reasonable price.
The next 4 tips are all concerned with finding the best position for the singer to stand in your small room.
2 Position the singer off-center in the room
If you stand in the center of your room when singing a vocal take, the reflections from the walls in front and behind you will arrive at the microphone at exactly the same time. This is because there is the same distance between you and each wall. The same can be said with the walls to your left and right.
This means those reflections will add up, as they will be in phase. Any nasty reflections will be emphasized, which is obviously not what we want. The effect will be worse if your room is square, as you will be the same distance from all four walls. This means four sets of reflections will arrive at the mic together.
Bearing all that in mind, it is best to not stand in the center of the room. Make sure you are a different distance away from each wall in your room.
Positioning is not the only factor to consider to get the best sound in your vocal recordings. Eliminating sources of unwanted noises and distortion is also very important. That’s why I wrote this article on preventing vocal recording distortion. It’s essential reading if you are going to be recording vocals of any kind in your home studio.
3 Move the singer away from hard surfaces
The closer the microphone is to a hard surface, the stronger the reflections coming back from that surface into the mic will be. Walls, desks, drawers, doors, etc. all have the potential to cause these nasty reflections.
So moving the singer so they are not too close to these is a good idea. Now in a small room, this is always going to be a compromise; moving away from one hard surface may well make you too close to another. Don’t be afraid to experiment with microphone positioning and find the sweet spot in the room where you get the best sound.
And don’t forget point 1 – you can always cover these surfaces up with some sort of soft covering to minimize the reflections.
Another aspect of positioning for a singer that is often overlooked is whether they should stand or sit. That’s why I wrote this article comparing standing and sitting positions for recording vocals. It’s highly recommended reading if you are going to be recording a singer, whether that is you or someone else.
4 Keep away from corners
This tip relates closely to the last one. Corners are bad for reflections, particularly in the bass frequency range. If you play electric guitar and you have ever put your amplifier in a corner, you will know that it tends to increase the amount of bass you hear in your guitar tone.
With a vocal recording, extra bass reflections can really muddy the sound you capture at the microphone. This will make your mix much harder to keep clear when you start combining the vocal with other tracks. Avoid corners for this reason, and you will make your life easier as your song recording develops.
As a side note, I have written a beginners guide to mixing. I highly recommended you check it out if you are new to mixing. It clears up some of the confusion novice mixers often have, and helps you avoid some common mixing pitfalls.
5 Sing at an angle to the walls
If you sing directly facing a wall, a lot of the sound will get reflected straight back at you right into the microphone.
If instead you are at an angle to the wall, a lot of the sound will get reflected away from you. Think of hitting a ball towards a cushion on a pool table; if you hit it straight at the cushion it comes straight back at you. If you hit it at an angle, it goes away from you at the same angle.
This is not a perfect analogy, as sound is omnidirectional (moves in all directions), so some sound will always come straight back into the mic. But standing at an angle to walls rather than face-on can help minimize those pesky reflections, directing some of them away from you.
6 Do not record vocals in a closet
Contrary to commonly given advice, you should not record vocals in a closet.
The theory is that closets often have lots of clothes in them that will absorb reflections. The problem is that closets are the ultimate small room. Because the space is so small, the reflections will be amplified because they have very little distance to travel back to the microphone. Then you start getting reflections of reflections, etc.
However many clothes you put in your closet, it is never going to be sufficient to reduce these reflections enough to get a great sound.
As a quick aside, obviously you need some music to record! Writing songs is an activity that is quite easy to get started with, but can get pretty difficult pretty quickly. I highly recommend reading my article on why songwriting is so hard. You’ll learn the reasons writing your own music can be difficult, and hopefully pick up a few handy tips and tricks to make it easier for you.
7 Use a cardioid microphone

Different microphones have different pick-up patterns. This means that some microphones pick up sound equally from all directions (omnidirectional pattern), other microphones pick up sound mainly from in front of them and very little from the back of them (cardioid pattern). Some microphones actually have switchable pickup patterns, so if you have one of these make sure you set it to cardioid.
This article does a great job of simply explaining mic pickup patterns.
The advantage of a cardioid microphone is that you can use the fact that it rejects most sound coming from behind it. So if you have a source of background noise in your room (e.g. a fan in your computer), you can point the back of the mic at this noise knowing that most of that sound will not be captured by the microphone.
This can also help to reduce reflections. If through experimentation you discover a particularly bad location for reflections, try turning the microphone around 180° in that location. This doesn’t always work, but it’s worth a try when trying to determine the best mic position and orientation in your room.
By the way, if you need a great value microphone to record vocals, you can’t go wrong with a good ol’ Shure SM-58. Check out this article on why the SM58 is a great recording mic for more details, and how to get the best out of it. It’s recommended reading if you are looking for a great value microphone for your home studio.
I’ve been using an SM58 in my home studio for years, and my vocal recordings with it have appeared on several commercially released EPs. Amazon offers the Shure SM-58 (affiliate link) for a surprisingly competitive price.
8 Sing about a foot away from the microphone
The distance the singer stands from the mic is always going to be a compromise. To minimize background noise you should stand as close as possible, so the singer is as loud as possible compared to the background noise (high signal-to-noise ratio).
But being very close to the mic means the “proximity effect” becomes very apparent. This is when bass frequencies start to get emphasized when close up to a microphone, resulting in an overly boomy sound that can be difficult to control. You may also have problems controlling levels at this distance. This can cause you to record too loud, potentially leading to problems with clipping and distortion.
As a general rule, singing about a foot away from the microphone is considered to be a good compromise. You can of course experiment with this distance for your particular singer and room, but it is a good starting point.
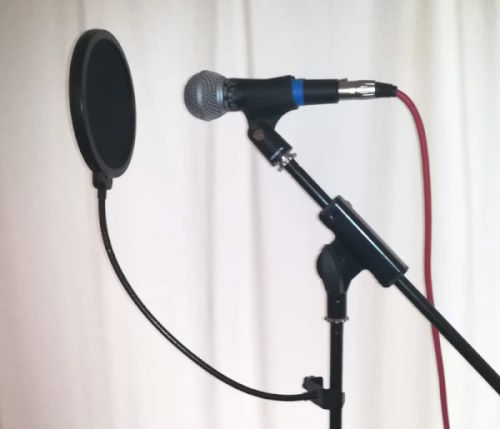
Using a pop filter will help enforce that distance between microphone and singer. However, the main benefit of a pop filter is to reduce “plosive” sounds that can ruin a vocal take. Check out my “Is a pop filter necessary?” article for details on how, when and when not to use a pop filter.
9 Take your time and experiment
Professional recording studios often have a dedicated space for recording vocals. This can be a vocal booth, or a particular spot in the live room. As such, they can very quickly start recording a vocal take with minimum setup time. They will have done it hundreds of times before, and the best position for the microphone will already be known.
In our small rooms, we do not have that luxury. Often the room is used for other purposes, so we can’t leave a microphone permanently set up for whenever we need to record some vocals.
So whenever we come to prepare for recording vocals, we are going to have to go through a set-up process. This means potentially taking a long time to find the best location for the mic in the room, strategically placing soft furnishings, recording test takes, etc.
It is tempting to rush this setup step. Don’t! Please take your time. A few hours spent doing this may seem like a lot, but it will pay dividends when you later come to mix your track. You will thank yourself for getting a good recording at this stage.
You may be familiar with the Pareto Principle. Applied to music production, this basically means that 80% of the quality in a track comes from recording, whereas 20% comes from editing/mixing. Get that first 80% right, and you have gone a long way to making a great sounding track.
In this stage, don’t be afraid to experiment with…
- microphone placement
- distance of singer from the microphone
- angle of microphone to the walls
- different microphones
- placement of soft furnishings
Experimentation can of course processing your vocal after recording, for example adding effects such as reverb and delay. Autotune is often used on vocals these days to correct tuning mistakes. It’s important to be careful with auto-tuning, as it is easy to ruin a recording with it. Check out these two articles to check out more information on using autotune on vocals…
- Why does autotune sound robotic? How to best the robots!
- Why is autotune considered bad? Is it really ok to use?
10 Add ambience later
In our small rooms, we generally assume that the acoustics are not going to be great. That is why we try to minimize the room sound (reflections) and record as dry a vocal as possible.
But we all know how great room ambience can sound! Think of a choir singing in a cathedral, or a solo singer in an old house in a big room with a high ceiling. Vocals can sound very bland without the room adding its character to them.
Fortunately today we have many excellent reverb plugins, both free and paid, that can add that ambience for us. These can make a big difference to our vocal tracks, adding in some character after recording. It also gives us so much control we wouldn’t otherwise have. Rather than being stuck with the sound of the recording room, we can effectively pick the room sound we want from the settings in our reverb plugin.
Start with your DAW’s built-in reverb plugin; these are often very good and your song won’t need anything else. And don’t be afraid to experiment with different reverb types and settings to find the right sound for your song.
11 Listen to what your ears tell you
Even after everything in this article, it may be that you actually have an excellent sounding small room! It’s unlikely, but it’s possible you don’t have to do anything in your room to get a great vocal take.
Record multiple takes and compare them, maybe varying the factors discussed in this article such as positioning in the room to see what difference they make. Multiple takes allow you to pick the best parts of each. Check out this article entitled “Should you record vocals in one take?” for strategies on recording vocals takes to get the best results from your room and equipment.
The ultimate decision-makers here are your ears. If your ears are telling you that you have a great room sound that will fit your track perfectly, go with them. Try some test takes to see how it sounds when recorded. And if your ears tell you to contradict all the previous advice in this article, commit to it and go for it.
I wish you the best of luck capturing a great vocal take in your small room!
Here is some of my favorite home studio gear…
Thanks for reading this article. I hope you found it helpful in your home music-making activities. Here are a few of the tools that I personally use in my home studio. These are affiliate links, so if you decide to use any of them I’ll earn a small commission.
Audio interface: My personal choice for audio interfaces are the Focusrite Scarlett series. I have been using these for years, and they have always given me great-sounding recordings. For a very reasonable price from Amazon you can buy the excellent Focusrite Scarlett 4i4, or if you don’t need MIDI capability the Focusrite Solo is a great choice.
Amp sim: Guitar amplifier simulator software has come on leaps and bounds in recent years, such that I record all my electric guitar parts using amp sims these days. One of the very best is the incredible Amplitube from IK Multimedia, which I have used on many of my songs.
Headphones for recording: My favorite headphones for recording are the Sony MDR-7506s, which I use for monitoring during all my recording sessions. They can also be found in many pro recording studios. Get the Sony MDR-7506 headphones from Amazon here.
General-purpose microphone: You can’t go wrong with a good ol’ Shure SM-57, one of the most versatile and ubiquitous microphones around. I’ve been using one in my home studio for as long as I can remember. Amazon offers the Shure SM-57 for a very competitive price.
To see all of my most up-to-date recommendations, check out this resource I made for you!
