
DISCLOSURE: This post contains affiliate links. If you buy through these links, I may earn a small commission.
Mixing is a vital part of music production. In professional studios, mixing is done in an acoustically treated room using high-end studio monitor speakers. However, in most home studios this sort of setup is not available, and we often need to mix our songs using headphones.
Mixing on headphones is similar to mixing on monitors, with a bigger emphasis on taking breaks, working for no more than 20 minutes at a time. Regularly test your mix on other systems, adjusting accordingly. Edit your tracks, roughly equalize their volumes, then balance volumes using the faders.
Producing mixes on headphones may not be ideal, but it can be made to work perfectly well and give excellent results. Follow the advice in this guide, and you will consistently be producing great-sounding mixes on your headphones.
If you are interested in checking out the best recording gear such as audio interfaces, studio monitor speakers, microphones, etc., you can find them at Amazon by clicking here.
Is it OK to mix on headphones?
Short answer…yes it’s OK to mix on headphones.
Long answer…
The ideal environment for mixing is an acoustically treated room, listening through high-quality specialist studio monitor speakers, where the speakers have been carefully calibrated and positioned for an optimum listening experience.
Now back to the real world…most of us do not have anything like that in our home studios. That kind of setup is the preserve of professional studios with large budgets and lots of available space. But this should not stop us mixing in our home studios. Headphones are not ideal for mixing, but with care you can make them work very well.
Headphones are not ideal for mixing for two main reasons…
- Headphones give an uneven frequency response; they emphasize bass amongst other things.
- Headphones project an unnatural stereo image; it’s like having a speaker strapped to either side of your head, right up against your ears.
There are things we can do to mitigate the effect of these characteristics. In particular taking breaks is even more important using headphones than with studio monitors, as your ears tire even quicker with headphones. Testing your mix on other audio systems is also vital, as you can hear what your mix sounds like away from the headphones, and adjust your mix accordingly.
(You will get thoroughly sick of me telling you to take breaks by the end of this article!)
In general, mixing on headphones is absolutely fine, as long as you follow the advice in this guide.
Headphones do offer some advantages over monitor speakers for mixing. Due to their portability, they allow you to mix away from your studio e.g. on a laptop in a hotel room. They also provide a consistent listening environment wherever you are. With studio monitors, sitting in a slightly different position or accidentally moving one of the speakers can alter the sound that reaches your ears.
What type of headphones should you use for mixing?
There are two main types of headphones used in recording studios; open-back and closed-back.
Open-back headphones are always preferred for mixing, as they give you a more realistic sonic representation. They don’t over-emphasize the bass as much as closed-back headphones, they reduce the influence of the proximity effect and the stereo field isn’t quite as artificially wide.
Studio reference headphones are a particular type of open-back headphones that are specifically designed to…
- Be accurate
- Not color the sound
- Not “enhance” the sound in any way (i.e. no bass boost, no EQ profiles, etc.)
This accuracy is what you want when you are mixing on headphones.
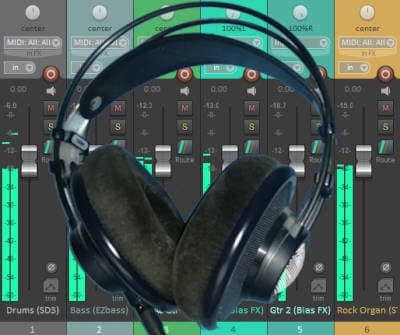
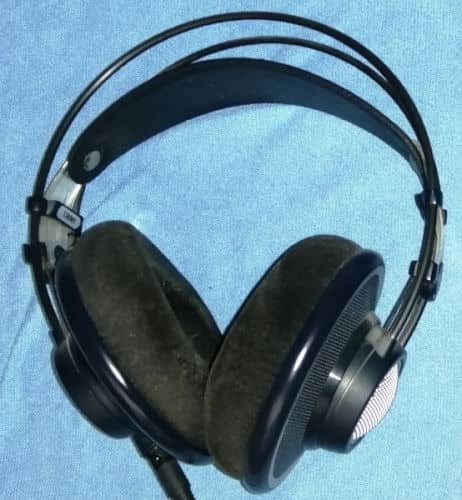
For many years for mixing I have been using the AKG K-702 Reference Headphones (affiliate link), which you can get at Amazon for a very reasonable price. I have mixed several commercial releases using these. They give excellent, accurate sound quality and reliable and durable. I highly recommend them if you are looking for a set of headphones for mixing on.
Take regular breaks when mixing on headphones
Why is it so important to take regular breaks when mixing using headphones?
It’s important to take breaks when mixing whatever you are mixing on, as your ears will tire and you need to “reset” them. But it’s even more important when using headphones. If you try to make mixing decisions when tired, you will start making mistakes and bad choices.
This is because the sound source is so close to your ears and head, that the tiring effect is even more pronounced. I don’t fully understand the science of it, but I know from experience that you ears tire quicker with headphones. I would recommend no more than 20 minutes at a time absolute maximum without a break. And to be honest, 15 minutes or even 10 might be better.
Set a timer when you are mixing, and stick to it! The breaks you take don’t have to be very long; 5 minutes is often enough. Just do something else; talk to your family for a bit, go for a short walk, get outside, go and make a cup of coffee, etc. Anything to get you away from your computer and reset your ears.
Check your mix away from your headphones
However accurate a set of studio reference headphones are designed to be, you can’t get away from the physics of having two speakers strapped right onto your ears. So it is incredibly important to periodically check your mixes on other audio systems, to make sure you’re heading in the right direction.
Pay particular attention to the bass. Headphones over-emphasize bass, so it’s important to listen to it on other systems. You may have to adjust your brain to add more bass than you think you need when using your headphones, so you get a better balance on other systems. Mixing is a constant sequence of compromises!
Whether you are mixing on headphones or speakers, you will need a good quality audio interface. I have been using Focusrite Scarlett audio interfaces for many years in my home studio. They have always given me great sound quality and reliability. I have mixed several of my commercially released songs using them. The Focusrite Scarlett Solo (affiliate link) is available from Amazon for a very competitive price.
Check your mix in mono
A lot of our music listening is actually done in mono. Think of a typical stereo Bluetooth speaker; unless your head is right up against it, the speakers are so close together that you are effectively listening in mono. Pretty much all DAWs will have a button on the master channel to switch between mono and stereo – make use of this often during mixing to check the balance is ok for both.
Because mixing is a confusing topic for novices and so many questions are asked about it, I have written a complete beginners guide to mixing in general. This guide goes into the mixing process in more detail than this article, and is highly recommended reading if you are new to mixing. You’ll learn repeatable processes for getting great mixes every times, and how to avoid common newbie mistakes.
Mixing on headphones process
Mixing on headphones is basically the same process as mixing on monitors. The main differences are how often to take breaks, how often to test your mix on other systems and using these tests to adjust your perception of what the mix should sound like in your headphones.
1. Organizing & editing
I’ve put organizing and editing together as they are clean-up tasks to do before you start mixing. If you start with everything neat, tidy and organized it will help the mixing process go more smoothly.
Organizing
Group similar tracks together. Create groups or folder tracks for each group e.g. “guitars” for all the guitar parts. This lets you easily process them as a whole when it comes to mixing e.g. if you wanted to add a touch of reverb to all the guitars.
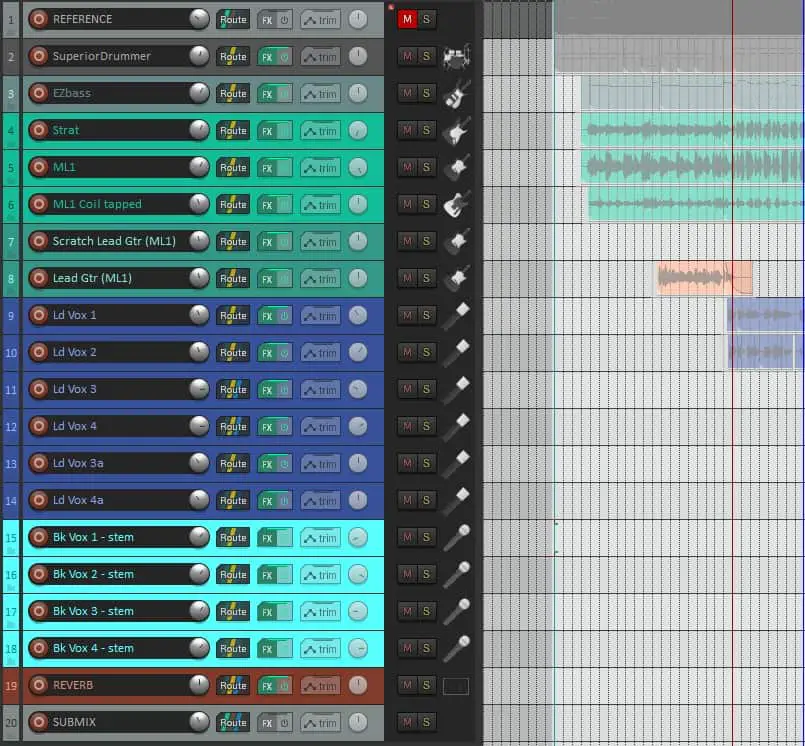
Color coding your tracks also helps with easily identifying what each type of track is. Sensibly labelling your tracks is also vital for this; use labels like “Rhythm Guitar 1” rather than “Bob’s part” because Bob played that particular track!
Finally, put your tracks in a sensible order. It doesn’t matter particularly what the order is, just that it is logical and well thought out. I like to start with drums, then bass, working up towards vocals last. This is a typical order in one of my songs…
- Drums
- Bass
- Rhythm guitars
- Lead guitars
- Keyboards
- Lead vocals
- Backing vocals
Feel free to use that, or to come up with your own scheme.
Editing
Clean up all your tracks. Make sure the beginnings and ends are all trimmed neatly – there’s no sound of you putting your guitar down or scraping the strings. Cut out any background noise. Trim silences; “silences” are often not completely silent, and if you have a lot of these together they can build up and make a low-level hum that can ruin your mix.
Fix any mistakes before you start mixing. The phrase “fix it in the mix” is a myth; there is no such thing. You can mask things in a mix, but you really need to fix mistakes before the mixing stage. The idea is to make the job of mixing as simple and straightforward as possible.
2. Gain staging
Gain staging is the process of getting all your tracks to be at similar volume. The important point as far as mixing is concerned is that this should be with all the faders set to their default 0 dB positions.
How do you do that? You can use volume or gain plugins on each track, or the volume in a virtual instrument you have on the track. Put all the faders at 0 dB, then use these plugin controls to get your tracks all sounding at roughly the same level.
This gives you room on all the tracks to turn the volume up and turn the volume down when mixing using the faders. It prevents you from having a track you need to turn up but can’t because the fader is already as high as it will go.
You want the tracks to average at about -18 dB and peak at no more than about -12 dB. Very transient instruments such as drums can go a little higher than this, maybe briefly as high as -6 dB but no more. I know -18dB seems very quiet, but trust me; this is where modern DAWs and plugins are designed to work best at.
After you’ve done your gain staging, this would be a great time to take a break, take those headphones off and rest those ears from judging the volume levels of your tracks.
For more details about the gain staging process, I recommend checking out my gain staging tutorial. This gives you a step-by-step process to follow to get your track volumes at a similar level. After reading this article, you should be get to the starting point for your mix quickly and reliably every time.
3. Import a reference track
Find a commercially released song you like, that sounds similar to the track you are working on. It should be one that you want your song to sound like sonically, e.g. the drums and bass are at the sort of level you want, the orchestration is similar and the feel is what you are going for with your song. You can then periodically compare your song to the reference track during the mixing process.
Bring the track into your project, then reduce its volume to match the volume of your song. This is important as it will be way louder than your song at this point, because it has been mastered for release.
Using a reference track is particularly important when mixing on headphones, as it gives you something to aim for. You can hear what a song like this should sound like in your particular headphones. Constantly refer to that track to make sure your mixing choices are moving you in the right direction.
4. The initial rough mix
In this step you will perform your first actual mix. The key here is to not take too long to do it; I’d suggest a maximum of 2 – 3 full listens through your song. It should take no longer than 15 – 20 minutes to do.
The idea is to just alter track volumes only. Just use the faders and don’t touch anything else; no panning, no effects. Aim to get the song sounding good with the instruments balanced well for most of the song. It won’t be perfect, which is fine as that’s not what we’re aiming for. That’s what the next steps are for.
And you’ve probably realized by now that I’m going to tell you to take a break! You’ve just done your first mix, so your ears need to rest and reset.

5. Apply panning
This is a good time to start placing your tracks around the stereo space. When mixing on headphones, remember that the stereo space is artificially amplified with those two speakers strapped right against your ears on either side of your head.
Imagine how the sound from a normal pair of speakers reaches your ears. Some of the sound from the right speaker will go into your left ear, and some of the sound from the left speaker will go into your right ear. This is called crossfeed.
With headphones, you don’t get any crossfeed. If you pan something all the way to the left, you only hear it in your left ear. This is unnatural and can lead to making some subpar panning decisions. One way to mimic crossfeed using headphones is to not pan all the way to the right or left. That way, there is always some of the sound coming from either side of the headphones, just like with speakers.
Don’t get too clever with panning here; keep it simple. Put the lead vocal, bass guitar, bass and snare drum in the center. Pan guitars left and right. Backing vocals can be spread across the width. Other instruments can be dotted around as you see fit; try to aim for a nice balance across the stereo space.
If you haven’t already, this is an excellent time to listen to your mix on some other audio systems. A car stereo, kitchen Bluetooth speaker, hi-fi separates system, whatever you have. Make notes, and adjust accordingly when you return to mixing.
6. Apply EQ where appropriate
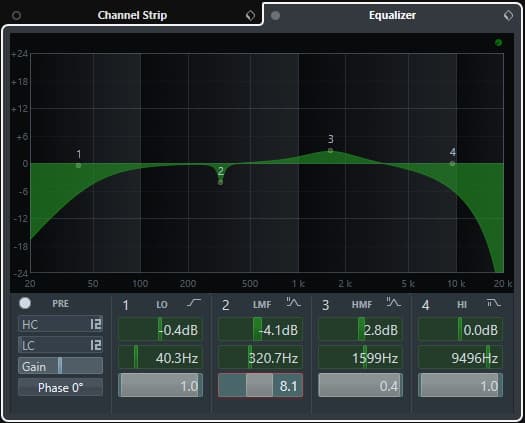
EQ (equalization) is basically a super detailed tone control. It gives you precise control over all the frequencies in a track, allowing you to cut or boost any frequency or group of frequencies.
For example, imagine you have a guitar track that’s a bit boomy. You could apply a high pass filter at about 100 Hz. This will only pass frequencies above 100 Hz, hopefully removing the boominess from the guitar track.
A word of caution; it is very easy to destroy a mix using EQ! Be careful, and favor subtle moves over drastic ones. Only make one change at a time, and carefully evaluate each one before moving on to the next one.
If you are relatively new to EQ, you really should check out my guide to what EQ numbers mean. EQ can be incredibly confusing for the beginner, and this guide will help you understand some of the rather obscure terminology that is often used when discussing EQ.
It is entirely possible that your mix doesn’t need any EQ. If it ain’t broke, don’t fix it! Only use EQ if you can hear something in your song that would be enhanced by it. Don’t apply any just for the sake of it, or because you read somewhere that you should make a 6 dB boost at a particular frequency.
Having said that, there are certain EQ moves that are very common in modern rock and pop mixes. For example, a high pass filter on guitars and keyboards is often used. This is to let the bass actually provide the bass frequencies. The lower end of guitars and keyboards can muddy that area, and this will help prevent that.
In general, favor cutting over boosting. Anything over a 6dB cut or boost is considered pretty drastic! Think very carefully before applying EQ of this magnitude.
Most of all, trust your ears. All the instruments and meters in the world are not worth a thing compared to those precision listening devices on either side of your head.
And absolutely, definitely, take regular breaks when EQ’ing. I would set a timer for 10 minutes, and stick to this rigidly. In my experience, there is nothing that tires the ears more than trying to analyze the frequencies in a mix, especially on headphones.
7. Apply compression where appropriate
Compression lets you level-out the volume for a track. Imagine you have recorded a track that has some very loud parts, and some very quiet parts. When you listen to your song, the loud parts are too loud and overpower the mix so you can’t hear anything else, and the quiet parts are too quiet so you can’t hear them against the rest of the instruments.
Compression can fix this. It reduces the volume of the loud parts and increases the volume of the quiet parts, making the overall volume more consistent.
With compression, you have a threshold control. Any part of the track which is louder than this threshold level will be reduced in volume. You can then use the make-up gain control to bring up the overall level of the track. This evens out the volume, making the loud parts quieter and the quiet parts louder.
The idea behind compression is very simple, but there is actually a lot to learn. There are lots of different compression algorithms and different ways in which the volume reduction occurs.
But don’t let that worry you. You can get started with compression very quickly. I would actually recommend starting with a preset. Find a compression plugin, apply it to your track and look for a preset named something similar to the track’s instrument e.g. acoustic guitar or backing vocal. Then adjust from there until you get the volume levelling that best suits your track.
One final point on compression – only apply it if your song needs it. Just like with EQ, it’s entirely possible that your track does not need any compression. It’s a great tool if you need it, but it can do more harm than good if over-used. Just be careful you don’t squeeze all the dynamics out of your song.
Bet you can’t guess what I’m going to tell you to do now…take a break!
8. Listen to your mix on other systems
Hopefully, you’ve been listening to your mix on other systems throughout the mixing-on-headphones process. It shouldn’t just be a one-off listen, you should keep doing it after each stage. This is so your ears don’t grow too accustomed to the sound in your headphones – try and keep the sound from other systems in your head so when you go back to your headphones you can use that feedback to inform your mixing decisions.
9. Apply effects
We’re really progressing with our mix now. It’s time to think about applying effects. As with everything else, be careful. Effects can be great and really add a distinctive character to your mix, but they are also easy to overdo.
Reverb is probably the most commonly used effect. It can really add space and depth to a mix. But don’t swamp all your tracks in heavy reverb; that’s a surefire way to make your mix a muddy mess. A good tip that I use when I apply reverb is to set the reverb where you like how it sounds, then back it off a touch.
There are loads of other effects like delay, phaser, chorus, etc., all with many free and paid plugins available. With so much to choose from, it’s easy to use too much or be paralyzed with so much choice. Just remember that effects are the icing on the cake, and the fundamentals need to be solid first.
And yeah, you know the drill by now. Take a break!
10. Listening and amending your mix
You’ve come this far, and hopefully you have a mix that you’re pretty happy with. At this point, I would take a longer break from it. Maybe a day, maybe a couple of days, even a week. You are likely to have become so involved in it, that it’s stuck in your head.
Taking some time away from it will let your brain reset and let you judge your work more objectively when you listen to it again. Now you can listen back on your headphones and on other systems including in mono, and make notes on anything you think needs tweaking.
Go back and make those changes. Only make one change at a time, and see if each has the positive effect you are looking for. Repeat this process until you are happy with your mix. And remember, take regular breaks as critically listening to something is very tiring on the ears.
Don’t aim for perfection; if you wait for it to be perfect, you’ll be waiting a very long time. Aim for good enough. Music production is always going to be a compromise between how something sounds on different systems. If it sounds pretty good on all the systems you try, then that’s good enough.
11. Create stereo mixdown
Once you have a mix you are happy with on several different sound systems, you are ready to produce a stereo mixdown file that you can distribute. You may have already done this a few times to play your song on other systems. This will be the same process, you are just producing the final version.
Select Render or Export in your DAW. You will be able to choose various options for the settings and format of your output file. Typical settings are 24-bit PCM bit depth, 44.1kHz sample rate and 2 channels (stereo). The file format is usually a non-compressed format such as WAV or AIFF.
Once you have chosen your settings and a location to output the file to, simply click Apply, Render or Export and wait for the file to render.
12. Mastering after mixdown
The very last step before releasing your song to the world is mastering. This is the process of performing any last minute sonic tweaks to your song as a whole, particularly with regard to making it play at a suitable volume for streaming, radio, etc.
Arguably, mastering is a separate process to mixing, but it is so important I think it is worth mentioning here. I have a whole article on mastering, which I highly recommend reading before you undertake this final process. You’ll learn a simple, repeatable process for mastering your song, and should finish with a streaming-ready song that you can distribute to the world.
As far as mastering on headphones goes, just follow the process. But bear in mind the things we know about music production using headphones; take regular, frequent breaks and make sure you listen to your song on multiple systems.
Some say you should never mix on headphones…
If you search the web or YouTube, you will find people who say that you should never mix on headphones, and studio monitor speakers will always be better for mixing on.
I disagree with this. Sure, I agree that the absolute best mixing environment is on quality studio monitor speakers, in a properly acoustically treated dedicated room. But which of us have that in our home studios? I’d argue that in a non-treated non-dedicated room, studio monitor speakers can actually give you a worse representation of the sound than a quality set of open-back reference headphones.
As long as you follow the advice in this guide and remember to take frequent breaks, use high quality open-back headphones and regularly reference on other systems, you should be fine. But if you want to learn more about the discussion on mixing on headphones and the various opinions on it, check out my whole article on the subject.
Here is some of my favorite home studio gear…
Thanks for reading this article. I hope you found it helpful in your home music-making activities. Here are a few of the tools that I personally use in my home studio. These are affiliate links, so if you decide to use any of them I’ll earn a small commission.
Audio interface: My personal choice for audio interfaces are the Focusrite Scarlett series. I have been using these for years, and they have always given me great-sounding recordings. For a very reasonable price from Amazon you can buy the excellent Focusrite Scarlett 4i4, or if you don’t need MIDI capability the Focusrite Solo is a great choice.
Amp sim: Guitar amplifier simulator software has come on leaps and bounds in recent years, such that I record all my electric guitar parts using amp sims these days. One of the very best is the incredible Amplitube from IK Multimedia, which I have used on many of my songs.
Headphones for recording: My favorite headphones for recording are the Sony MDR-7506s, which I use for monitoring during all my recording sessions. They can also be found in many pro recording studios. Get the Sony MDR-7506 headphones from Amazon here.
General-purpose microphone: You can’t go wrong with a good ol’ Shure SM-57, one of the most versatile and ubiquitous microphones around. I’ve been using one in my home studio for as long as I can remember. Amazon offers the Shure SM-57 for a very competitive price.
To see all of my most up-to-date recommendations, check out this resource I made for you!
