
We are spoiled for choice when it comes to audio interfaces on the market today. They come in all sorts of shapes and sizes, right from the smallest 1-input unit, up to much bigger rack-mountable units with 18 or more inputs. So when you go to buy an interface, how do you know how many inputs the one you purchase should have?
Only a 1-input audio interface is needed for recording one sound source at a time. For one musician but two sources e.g. vocals and guitar, 2 inputs are required. For a drum set, a minimum of 8 is recommended. A full band requires at least 8, going up to 16 if the band has a full drum set.
There is a lot more to it than that, but it does give you a good basic idea of what number of inputs you should be aiming for. The rest of this article expands on this, going into considerable detail on how to decide how many inputs you need. We’ll take into account your particular application and potential future expansion.
If you are interested in checking out the best recording gear such as audio interfaces, studio monitor speakers, microphones, etc., you can find them at Amazon by clicking here.
Now, before we get into the number of inputs you need…you may not need an interface at all! To help you work out if you require one, I have written a whole article asking do you need an audio interface? It’s highly recommended reading before you part with any cash on an interface.
Recording live vs a track-at-a-time
It doesn’t matter how many instruments are in a band; if you record every instrument one-at-a-time, then you only need one input! This is what multi-track recording using a DAW (Digital Audio Workstation) fundamentally allows us to do.
If you’re not sure what DAW is or how it relates to music recording, one of the most popular articles on this website is the guide to recording your own music at home. This is a beginner focussed article, and it will teach you the basics if you are new to all this, right from explaining the basic equipment you need up to making your first recording.
Recording a band live means recording all the musicians playing the instruments at the same time, just like they would in rehearsal or at a concert. You could argue that you only need one microphone for this – put one mic in the middle of the room and press record!
While this would work, you would get just one track with all the instruments on it. This cancels out all the benefits of multi-track recording, i.e. the control it gives you over individual instruments. If your drums in the recording are too loud, you can’t turn them down because turning them down would turn down everything else as well.
So recording a band live usually means putting all the instruments on separate tracks. Meaning you would need at least one input on your interface for each instrument.
If you are relatively new to music production and are unsure exactly what a track is, then check out my beginners guide to tracks in music recording article. It explains simply what tracks are, how they are used and should clear up any confusion you may have.
This table summarizes the typical number of inputs required for common live recording situations…
| Recording Source(s) | Number of Channels |
| Single instrument or vocal | 1 |
| Acoustic guitar and one vocal | 2 |
| Acoustic duo (2 guitars, 2 vocals) | 4 |
| Drum set (individually mic’d drums/cymbals) | 8 |
| Full band | 8 – 16 |
If you are a one-person musician in a home studio (much like myself the vast majority of the time), the one-track-at-a-time method is likely how you work. Record some bass guitar, then some rhythm guitar, maybe some piano, add some vocals, etc. All of which only require only one input on your interface.
There are other considerations (read on for details) that may push you towards buying an interface with more inputs. But in this situation, one input is all you actually need.
To help you select a suitable interface for your personal requirements, I have a page on this site where you can check out my recommendations for audio interfaces.
If you are using an audio interface with a laptop computer in particular, there are some specific issues you should consider. That’s why I have a whole guide on using audio interfaces with laptops. It takes you through exactly how to use an interface with a laptop, the best interfaces to use, the issues you may encounter and how to solve them.
One musician, two audio sources
The classic example of this is a musician who sings and plays the acoustic guitar at the same time. But you could be playing a keyboard and singing, or an electric guitar and singing, or maybe even playing the guitar and some bass pedals.
If you wanted to capture a performance like this, then 2 inputs are needed. You would need, for example, one input for the vocal mic, and one for the guitar whether that is for a jack cable coming from an acoustic-electric guitar, or a microphone in front of an acoustic guitar.
Of course if you record the parts separately, you only need the one input.
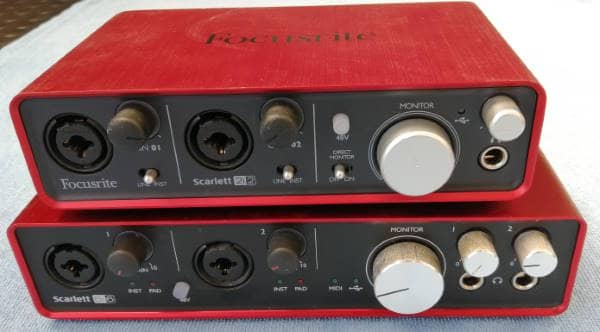
As a quick aside…my preferred audio interfaces are the Focusrite Scarletts. But there are many different models in the range, and it’s not just how many inputs they have that you need to consider. To help you decide which one to buy, I have written a guide to choosing the right Focusrite Scarlett for you. It will help you make an informed choice based on your personal musical and recording needs.
Convenience and minimizing setup time
Up to this point, we have only considered what inputs are strictly necessary. But this is not the only factor in determining how many inputs you should have on your audio interface.
Imagine you have a 1-input interface. You record an acoustic guitar part through a microphone. You spend ages getting the levels and the settings right. Then you need to record a vocal part. So you unplug the guitar mic, plug in the vocal mic, and go through the same thing again. Then you decide you need another guitar part, so you unplug the vocal mic and plug the guitar mic back in….you get the idea.
It would be much more convenient to have 2 inputs available, and keep the vocal mic permanently connected to input 1 and the guitar mic permanently connected to input 2. Along with the corresponding levels and settings, now when you need to switch from recording vocal to guitar there is no setup required. You just start recording from the other channel on your interface.
Now this may not be too bad if you only have 2 sources. But imagine if you record electric guitars, basses, pianos, drums, backing vocals, synths etc. That is a lot of switching out cables and configuring levels and settings!
So there is something to be said for buying more inputs than you actually strictly need, just for the convenience of keeping things that you record permanently plugged in and configured. Think about what you record the most. If there are 4 different things you record often, then even if you only ever record one thing at a time, perhaps a 4-input interface would save you a lot of time even though only 1 input is strictly necessary.
I tend to leave an electric guitar plugged into one input and a vocal mic plugged into another on my interface, along with the corresponding levels and settings configured. These are the things I record most often. I also have my digital piano connected permanently through MIDI, which leads us nicely on to the next section.
Sometimes, you can record what you think is a great take only for there to be annoying clicks and pops present on the track when you listen back to it. That’s why I have a dedicated guide to eliminating interface clicks and pops on this website. It’s recommended reading for anyone performing any sort of recording activity using an audio interface.
Types of input
All inputs are equal, but some are more equal than others! (With apologies to George Orwell).
There is not necessarily just one type of input on an audio interface. So don’t assume that if your interface is advertised as having 4 inputs, that you will be able to plug 4 XLR cables from microphones into it at the same time. You may be disappointed, so when purchasing check the type of each input on the interface, not just the number.
Common types of input on audio interfaces are….
- XLR – The standard connection for a microphone, much like you would find on a mixer. You’ll usually find one or more of these on the front of an interface, and anything you record using a mic (vocals, guitar, guitar amp, etc) will go through one of these.
- ¼ inch jack (mono) – If you play electric guitar, you have used one of these. Will take cables from guitars, but also from keyboards and other electronic audio sources. Note that these are mono – if you wanted to record a keyboard in stereo it would take up 2 of these inputs. Although there may be other options…see below.
- Combo XLR / ¼ inch jack – Inputs that are a combination of the above two. You can plug either an XLR cable or a ¼ inch jack cable into one of these.
- MIDI (5-pin DIN) – Usually found on the back of an interface, these are for connecting a keyboard or other MIDI controller. With these, you don’t record audio but instead record MIDI data (instructions on what notes to play, at what volume and for how long). If you’ve been playing keyboard or synth for any length of time you probably are familiar with MIDI. It offers a lot of advantages in editing keyboard parts.
- Line (either jack or RCA) – These take a line-level signal. They come in either jack or RCA forms – RCA is the connector you find on Hi-Fi amplifiers for connecting turntables, tuners, CD players etc. You could connect keyboards, mixers, maybe another audio interface output to these. Anything that kicks out a line-level signal can use this type of input.
- Digital (ADAT, S/PDIF) – Can be used to digitally connect another audio interface to expand the number of inputs. Found only on higher-end interfaces. If you’re in the market for your first audio interface, I wouldn’t concern yourself too much with these.
When recording several parts, it can be difficult to decide the best order to record them in. Should you do the drums first? Or the bass? Or the strummed acoustic guitar part? My “what to record first in a song” article gives you various recording order strategies, and helps you decide the best method for you.
Multiple inputs for one audio source
Up to this point we have assumed that each audio source we are recording will take up one channel on the audio interface. But there are plenty of applications where you may need to use more than one input even though you are only recording one thing.
It is a relatively common technique to blend the sound coming from two different styles of microphone. For example, you may put a dynamic microphone and a condenser microphone in front of a singer, and record the sound coming through both mics. That way, you can blend the sound together in your DAW, capturing the qualities of each microphone to get a unique sound.
Guitar amplifiers are also frequently recorded with more than one microphone. You might have 2 different types of microphone close up on the amp, and maybe another one further away to capture some of the room’s natural ambience.
Take this technique into account when considering an audio interface and the number of inputs you require. If you are a beginner I wouldn’t advise recording a source using multiple microphones. You are likely to run into phasing issues. This is where unless you get the mic distances from the source right, the waveforms from the two mics cancel parts of each other out, leading to a weak or thin recording.
Related to selecting sources and inputs, is choosing physically where in your home to record. This can be tricky, as there are many factors that go into selecting a location which will give you a great recorded sound. Check out this “best place to record at home” article, which will assist you in choosing and setting up the room in your home to give you the best sounding recording possible.
Phantom power
No, I haven’t gone all supernatural on you.
Some microphones, particularly condenser microphones, require what is known as phantom power. This is a 48V signal that is transmitted down the XLR cable from the audio interface’s input to the microphone to power it. It is called phantom power as there is no power cable connected to the mic; the power is transmitted over the XLR signal cable as if by magic!
What this boils down to is that if you have a microphone that requires phantom power, make sure to get an audio interface that can supply it through its XLR inputs. You shouldn’t have a problem with this, as most good quality interfaces on the market should do this. Look for a button or switch usually on the front (but not always) of the interface that says +48V or phantom power.
Phantom power on an audio interface can be applied globally or per channel. Globally means the 48V will be sent down all the XLR inputs, whereas per channel means you can choose which inputs it is transmitted on. So if you have one mic that needs phantom power in one input, and another that doesn’t in another input, they will both get the phantom power if it’s sent globally.
This is important as phantom power can damage some microphones not designed to take it. I wouldn’t worry too much about this, as most mics you will find in a home studio will be fine. I have had phantom power sent to my SM57 and SM58s many times without any issue. It’s more expensive ribbon microphones that will have problems.
Recording a drum set – number of inputs required
You have probably seen pictures of a drum set in a professional recording studio surrounded by lots and lots of microphones. Great if you have the space, equipment and money, but not available to the majority of us.
Drum sets get a special mention, as they are the one instrument that commonly is recorded using a lot of microphones. If you are lucky enough to have this sort of setup in your home studio, I would advise you to look for an interface with a minimum of 8 XLR inputs. You would be looking at putting microphones on the following elements of the drum set as a minimum…
- Kick drum
- Snare drum
- Rack tom
- Floor tom
- Overheads (x2) – captures the sounds of the cymbals from above
In addition, you may want to add microphones to these…
- Hi-Hat
- Additional rack tom
- Room mic (captures the room’s natural ambience)
If you have a drum set you want to record but don’t have lots of microphones, all is not lost. You can get a surprisingly good sound using just one microphone, placed 3 – 6 feet in front of the kit at about chest height of the drummer. Obviously this doesn’t give you the control over the individual elements of the kit, but is a great way to capture a drum set if you have limited equipment.
Recording a full band live
Let’s go into a little more detail on the number of interfaces for recording multiple musicians at the same time. If you have the room to record a full band live in your home studio, then you are very lucky!
I think it’s more realistic to assume that the closest most of us will come to this is to record in a hybrid way, e.g. record 2 guitars and bass at the same time, then maybe lead vocal and piano, then maybe 2 backing vocals, etc.
Only your individual intentions can decide how many inputs you will need for this. In my studio, the highest number of musicians I have ever recorded at the same time is two.
But just for the sake of it, let’s consider the maximum number of mics we would need for a full band consisting of singer, 2 guitar players, keyboard player, bass player, drummer. And we’ll assume 2 of the musicians also provide backing vocals…
| Instrument | Number of inputs | Input type |
| Lead vocal | 1 | XLR |
| Guitar 1 | 1 | Jack (DI) |
| Guitar 2 | 1 | Jack (DI) |
| Keyboard | 1 | MIDI |
| Bass | 1 | Jack (DI) |
| Drums | 8 | XLR |
| Backing vocals | 2 | XLR |
| TOTAL: | 15 | 11 XLR, 1 MIDI, 3 Jack |
This is way beyond the vast majority of home studios, but an interesting exercise regardless. If you do have this sort of setup, you have a lot more money (and space) than me!
Example of choosing how many inputs needed
This is an example based on my personal requirements for my own home studio setup.
I leave a microphone and an electric guitar permanently connected to my interface for convenience. I also have either my digital piano or my MIDI controller keyboard connected to the MIDI interface. Whenever I put drums into a song I use Superior Drummer or EZ drummer, so no input is necessary. To record bass guitar, I swap out the guitar for my bass.
So my requirements are simply 1 x XLR, 1 x Jack, 1 x MIDI. And that’s it!
If you’re interested, I am using a Focusrite 6i6 at the moment.
Future expansion
As you gain more experience, you may grow beyond the number of inputs you currently need.
For example, do you just record yourself at the moment, but plan to invite friends or band members to record with you in the future? Maybe you use entirely programmed drums at the moment, but would like to get into recording a full acoustic drum set in the future.
When you’re considering purchasing an interface, it is worth taking your possible future needs into account. This may prevent you having to buy another interface if you plan some growth in your recording methods in from the start.
It is sometimes possible to use multiple interfaces to give you extra inputs. This though is quite an advanced technique, and is beyond the scope of this article.
Here is some of my favorite home studio gear…
Thanks for reading this article. I hope you found it helpful in your home music-making activities. Here are a few of the tools that I personally use in my home studio. These are affiliate links, so if you decide to use any of them I’ll earn a small commission.
Audio interface: My personal choice for audio interfaces are the Focusrite Scarlett series. I have been using these for years, and they have always given me great-sounding recordings. For a very reasonable price from Amazon you can buy the excellent Focusrite Scarlett 4i4, or if you don’t need MIDI capability the Focusrite Solo is a great choice.
Amp sim: Guitar amplifier simulator software has come on leaps and bounds in recent years, such that I record all my electric guitar parts using amp sims these days. One of the very best is the incredible Amplitube from IK Multimedia, which I have used on many of my songs.
Headphones for recording: My favorite headphones for recording are the Sony MDR-7506s, which I use for monitoring during all my recording sessions. They can also be found in many pro recording studios. Get the Sony MDR-7506 headphones from Amazon here.
General-purpose microphone: You can’t go wrong with a good ol’ Shure SM-57, one of the most versatile and ubiquitous microphones around. I’ve been using one in my home studio for as long as I can remember. Amazon offers the Shure SM-57 for a very competitive price.
To see all of my most up-to-date recommendations, check out this resource I made for you!
