How to record your own music at home – an illustrated guide
DISCLOSURE: This post contains affiliate links. If you buy through these links, I may earn a small commission.
The world of high-quality home recording of your own music is open to almost anyone today. For a relatively small amount of money, you can achieve results that would only have been possible in a professional recording studio thirty years ago. However, the process of recording your own music at home, while not difficult, can be quite involved and there are a lot of steps and a lot of information to get your head around.
To record your own music at home, you need a computer running a DAW (Digital Audio Workstation) program, and an audio interface connected to the computer, e.g. via USB. Plug a microphone or instrument into an audio interface input. Create a new track in the DAW, set the levels, then click record.
Let’s take a detailed look at the process of recording your own music at home. We will have a look at what equipment and software you will definitely need, and optional equipment that might be useful. Then we’ll look at how to set everything up, and the detailed process of recording your music both in a general sense, and for specific instruments.
Home recording and all its associated equipment can be incredibly confusing if you’re new to it! That’s why I have written a guide about what exactly is a home recording studio is. This will take you through the different types of setup, the equipment involved and what exactly you can do with it. I highly recommend reading it if you are a novice home recordist.
If you are interested in checking out the best recording gear such as audio interfaces, studio monitor speakers, microphones, etc., you can find them at Amazon by clicking here.
What do you need to record your own music at home?
In the simplest sense, all you really need is something that can record. Your phone immediately springs to mind; there will be some sort of audio recorder app on there, with loads more available to download and install from your app store. Just press record, and start singing or playing!
That’s not what this article is about. I’m assuming that you are intending to record your music in as high a quality as possible, and you are going to be recording multiple tracks. This might be as simple as recording an acoustic guitar, then recording yourself singing over the top. Or it might be as complex as a full rock mix, for example with MIDI drums, bass, 4 electric guitar parts, a piano, lead vocals and three backing vocal tracks.
The rest of this section assumes a high-quality, multi-track approach to home recording.
I have a whole article dedicated to the essential equipment you need for a home recording studio setup. It goes into much more detail than in this section, and you’ll learn what really is essential, what you will probably need at some point and what you can get away without. I highly recommend you check it out, as it will probably help you save money and put together the right gear for you.
A computer
While there are other ways to perform multi-track recording at home, using a DAW program installed on a computer is by far the most convenient and easiest to use. Plus, a lot of people already own a computer that will be perfectly adequate for this purpose. A Windows-based PC or an Apple Mac will both work fine.
It used to be that a specialist high-powered computer was needed to do any sort of high-end audio work; thankfully that is no longer the case. Pretty much any consumer-level machine bought today should work fine, as long as it has a free USB or Thunderbolt port to connect an audio interface to.
Of course, the higher-spec the computer is, the better it will perform, allowing you more tracks, more effects plugins, and more virtual instruments. But if you’re reading this article, you are probably near the beginning of your home music recording journey, so my advice would be to use what you have to start with. If in a few months/years you think you need a more powerful computer, then you can address it then.
An audio interface
The audio interface connects whatever you are recording from (microphone, guitar, keyboard, etc.) to your computer so it can record it. Audio interfaces also contain high-quality hardware and software, specially designed for high-end audio applications such as music recording. They typically connect to your computer over USB or Thunderbolt; note that there are different types of USB ports and cables – make sure your interface has the correct type for your computer. Interfaces usually come supplied with a cable to connect to your computer.
Audio interfaces will typically come with audio drivers – low-level software that lets your PC talk to the audio hardware. These are very specialist hi-end drivers, not the typical commercial sound drivers that will have shipped with your PC. It’s important that you install these drivers to get the best out of your audio software and hardware. On Windows these are usually ASIO drivers, and you will be prompted to install them either from a disk supplied with the audio interface, or from the manufacturer’s website.
You may now be asking “But my laptop has a mic input; can’t I just plug a microphone in there?“. Well, yes and no. You can with the right adapter, but I wouldn’t recommend it. Those built-in ports are not designed for high-end audio use, and you are likely to get disappointing results. Plus, the drivers used will only be standard consumer-level sound drivers, so you will probably end up having issues with latency (delay between playing a note and hearing it come out of the computer).
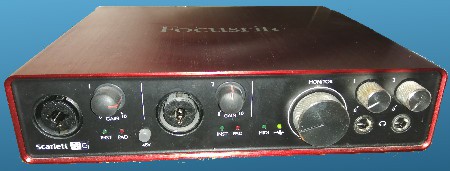
So I would say an audio interface is probably an essential piece of kit for recording your own music at home. I have been using Focusrite Scarlett interfaces for years, and they have always given me great sounding recordings for not very much money. You can buy the Focusrite Solo from Amazon (affiliate link) for a very reasonable price.
Now having said that…an audio interface isn’t necessary for every musical activity in a home studio. To help you work out if you do require one, I have written a whole article asking do you need an audio interface? It’s highly recommended reading before you part with any cash on an interface.
One other thing worth mentioning is MIDI; this is an interface commonly used by keyboards that lets you record instructions for playing notes rather than the notes themselves. It has some advantages over audio, particularly with editing inside a DAW. Some audio interfaces have MIDI ports built-in; worth considering if you are a keyboard player. Don’t despair if yours doesn’t though – you can buy separate MIDI interfaces.
DAW Software
The way I think of a DAW or Digital Audio Workstation, is that it is a recording studio in software.
It is essentially a software program that turns your computer into a recording studio; giving you the ability to record multiple tracks over the top of one another, mix tracks together, apply effects to individual tracks and the mix as a whole, and a whole lot more. This is the centerpiece of your home music recording setup, and where you will be spending the majority of your time.
There are many DAWs available, both free and paid versions. In terms of what they do, they all do pretty much the same things. They will all have a track view where you can add and delete tracks, edit and move the parts you have recorded, and re-arrange your song. They also have a mixer view where you can adjust the relative levels of your tracks, apply effects and automation, and control the song as a whole. All DAWs come with a multitude of built-in effects plugins, so although you can buy 3rd party plugins, you are unlikely to need to when you’re just starting out.
The differences tend to be in the user interface and in the workflow of how you use that particular DAW. My advice is to try a few, and see which one you like best. Even the paid ones usually have trial versions which you can use for free for a while to try them out.
Here’s a list of some free DAWs currently available…
- Garageband (MAC only)
- Pro Tools First (Windows and MAC)
- Cakewalk by BandLab (Windows only)
- PreSonus Studio One 5 Prime (Windows and MAC)
- Ableton Live 10 Lite (Windows and MAC)
And here is a list of some paid DAWs…
- Reaper (Windows and MAC)
- Cubase (Windows and MAC)
- PreSonus Studio One (Windows and MAC)
- Logic Pro X (MAC only)
- Pro Tools (Windows and MAC)
You can see my personal DAW preference in this article on recommended DAWs.
Headphones
If you are recording anything using a microphone whether it’s vocals, acoustic guitar or anything else, headphones are pretty much a necessity. That’s because when you are recording another track over something you have already recorded, if you played it through your speakers to record over then the microphone will pick up the sound from the speakers as well. So you wouldn’t end up recording a track with just the sound from the microphone – it would have “bleed” from the speakers on it as well.
This defeats the main advantage of multi-track recording – having all your tracks completely separate so you can manipulate them individually. So I would say headphones are essential. They also have the advantage of portability over speakers. It is also easier and cheaper to get a good sound out of headphones than it is out of monitor speakers.
So what sort of headphones do you need? Firstly, if money is tight and you have some headphones lying around – use those! They need to be wired headphones rather than Bluetooth, but any old earbuds you have will do for now.
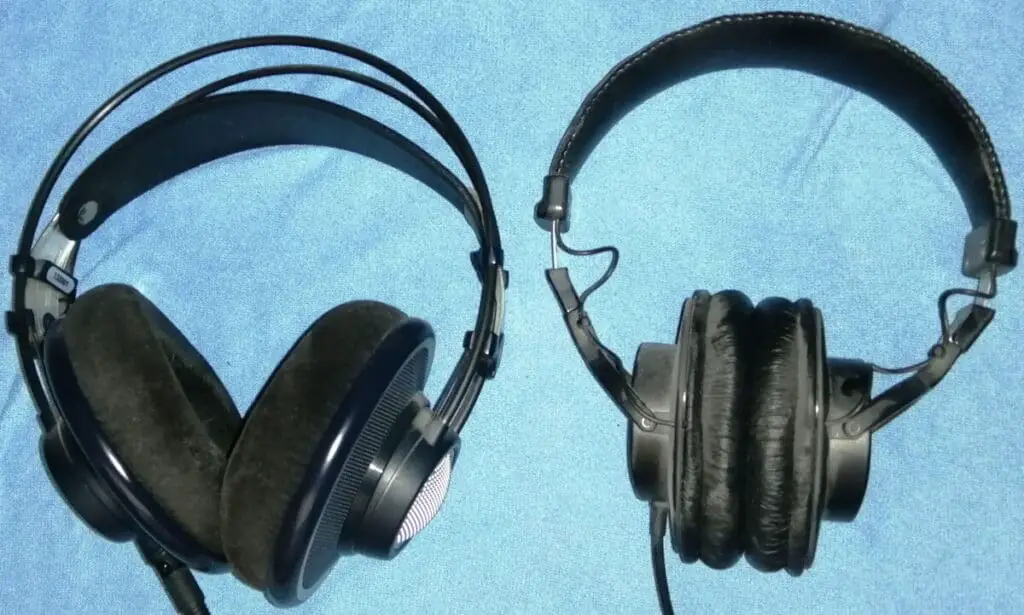
If you have a little bit of money to spend, I would highly recommend a pair of good-quality closed-back headphones to start with. My favorite headphones for recording are the Sony MDR-7506s, which I have been using in my home studio for many years. You will usually find a pair or two of these in most pro recording studios. You can buy Sony MDR-7506 headphones from Amazon (affiliate link) for a great price.
Monitor speakers (optional)
“Can’t I just use my built-in laptop speakers?” I hear you ask. No!
And here’s why…they just aren’t good enough quality. Even the very best laptop speakers are not physically capable of reproducing the frequencies you need to hear to make the best out of your recorded music. Particularly bass frequencies – if you tried to mix one of your songs on laptop speakers, it will be nigh-on impossible to get the instruments all balanced right as you won’t be hearing a big part of each of their sounds.
“What about my normal hi-fi speakers?“
OK, so hi-fi speakers are a big step-up from built-in laptop speakers. So I would say yes, at a push you can use them, but I wouldn’t recommend it. The reason is that hi-fi speakers “color” the sound – they are designed to make whatever music they play sound as good as possible. As odd as it sounds, that isn’t what we want. We want speakers to be as neutral as possible; we want them to accurately show us what our music sounds like, not change it to make it sound better.
So what we really need are studio reference monitors. These are designed to be neutral and accurate. You can pick up a pair of very good monitor speakers for a few hundred dollars. There is a great article on MusicRadar about affordable monitor speakers for recording; this gives you several bang-for-buck options.
I should say that speakers are not essential. I have been recording in my home studio for 20+ years, and have never had a set of studio monitor speakers. If you have a pair of good quality headphones – preferably 2 pairs; open-back for mixing and closed-back for recording – these can be used perfectly adequately instead.
Speakers and headphones are very important when it comes to mixing and mastering your songs. These are processes you will undertake after recording; mixing is balancing the volumes of all your parts, and mastering is preparing your song for release. These processes are often confused. That’s why I wrote my article on the differences between mixing and mastering. Check it out to learn more!
Microphone
It’s fairly obvious what a microphone is for; anything you want to record that you can’t plug directly into your audio interface, you will need to put a microphone in front of it to capture its sound. Vocals are the most common thing recorded in a home studio with a mic, closely followed by acoustic guitar.
So what type of microphone should you get? A lot of articles on home recording will recommend a large-diaphragm condenser microphone as a first choice. The Rode NT1-A (Amazon affiliate link) for example, which is an excellent microphone.
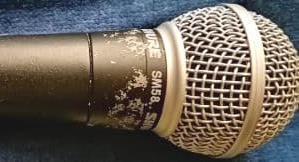
While this is a fine choice, I actually recommend going for a dynamic microphone for your very first mic, especially if funds are limited. Dynamic mics are cheaper, a little bit easier to work with, and more durable than condenser microphones. The Shure SM57 or Shure SM58 (both Amazon affiliate links) would both be great choices.
If you already have a microphone, don’t be afraid to use that. I’ve often said that the very best equipment is whatever you have available to you now, as it allows you to start recording immediately rather than thinking you have to wait until you can afford some really expensive high-end gear.
Recording studios, both amateur and professional, often have multiple microphones. This gives you the ability to record more than one thing at the same time, e.g. an acoustic guitar and a vocalist. It is not immediately obvious how to connect more than one mic for recording – that’s why I wrote this article on connecting multiple mics to a computer. It’s recommended reading for anyone planning on multiple microphone recording.
Microphone stand
Do you really need a microphone stand – can’t you just hold the mic?
I would argue that yes, you do need a microphone stand. First, if you are recording an instrument such as acoustic guitar, you need something to put the microphone on. You might be able to get away with resting it on a table or chair or something similar, but save your sanity and get a mic stand. This will hold the mic steady, and be fully adjustable. It will also stay in the position you put it, not roll away or fall on the floor.
For recording singing, if you are holding the microphone you will get handling noise. Trust me, this will be seriously annoying. The last thing you want is the frustration of recording a great vocal take, only to hear a load of ugly thuds and bangs underneath the singing when you listen back to it. So put the mic on a stand. It also gives you something to attach a pop-shield to; see the next section.
There are 2 main types of mic stand – boom and straight. Straight stands are simply one pole going straight up from the ground. Boom stands are 2 poles, the top one being a “boom” arm that can be angled separately from the bottom pole. Boom stands are ideal for singer-guitarists, as the top arm can be angled over the guitar. I would recommend a boom stand for maximum flexibility.
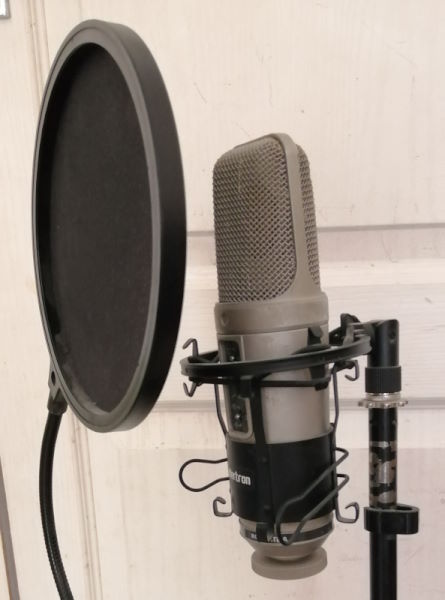
Pop shield
A pop shield or pop filter or pop screen is a barrier you place in front of a microphone when recording a singer. They are designed to reduce plosives – sounds like “P” and “B” that can cause unpleasant loud “popping” noises due to the sudden rush of air into the microphone.
Pop shields are pretty much essential if you are recording vocals; those plosive sounds have the potential to ruin a vocal take. Fortunately, pop shields are not very expensive and can be picked up for about $10.
Drum software (optional)
There are 4 options for getting drums into your music; mic’ing up a real drum set, directly plugging an electronic kit into your audio interface, using drum loops, or using virtual drum software. More on these options later. I am not a drummer, so my preferred way of putting drums in my songs is to use virtual drum software.

Virtual drum software are programs that contain sampled drum set sounds along with MIDI patterns that play those sounds. Two of the best known are from Toontrack – EZdrummer and Superior Drummer. These are both products that I have extensively used myself.
This type of software is amazing. The drum sounds they contain are recorded in some of the best studios in the world, and the patterns are often played by some of the world’s most renowned session drummers. They are a great way of getting high-quality realistic drums into your songs, without being able to play drums yourself. Much, much easier than mic’ing up a real drum set!
There are free options available as well (just google “free drum software”), although they don’t have quite the convenience, versatility and quality of the paid options. Although the paid options aren’t that expensive – EZDrummer 2 can be picked up for $149. I consider that well worth it.
Other virtual instrument software (optional)
There may be other software you want to use, particularly if you are a keyboard player. There is so much software that allows you to play it via MIDI – soft synths (software synthesizers), sound modules, samplers, bass instruments etc. These are so-called virtual instruments.
You can connect your keyboard to your computer and DAW via MIDI, then use your keyboard to play the sounds in the software. It’s a great relatively cheap way of getting your hands on potentially thousands of sounds. I have used Sampletank for many years, which is essentially a huge library of sounds. I often use the pianos, organs and pad synths from Sampletank.
Again, there are many free and paid options. None of this software is essential, but may be of great use to you in getting that particular sound you are after, or inspiring you to use an unusual or unorthodox sound.
Now we’ve gone through the list of equipment you may require, you may be feeling a little overwhelmed and thinking can I really do this at home?! Yes you can! It really isn’t that difficult to get started. Check this article out about if you really need to go to a studio to make music. It should reassure you about what you can do at home and how easy it can be.
How to set up your home recording equipment
Setting up your equipment to record your own music is not difficult, but there are a few traps and pitfalls you can fall into. Hopefully, this section will help you avoid those. It is worth pointing out at this stage that it is a good idea to turn down all volume and gain controls on all your equipment (audio interface, speakers etc.) until everything has been connected up. This helps avoid unpleasant popping sounds as you start to turn things on.
You are going to have to select a location in your home to do your recording. That’s why I wrote my guide on selecting the best place to record at home. Check it out to discover where you can feasibly record, tips to get the best sound out of your room, and some locations to avoid.
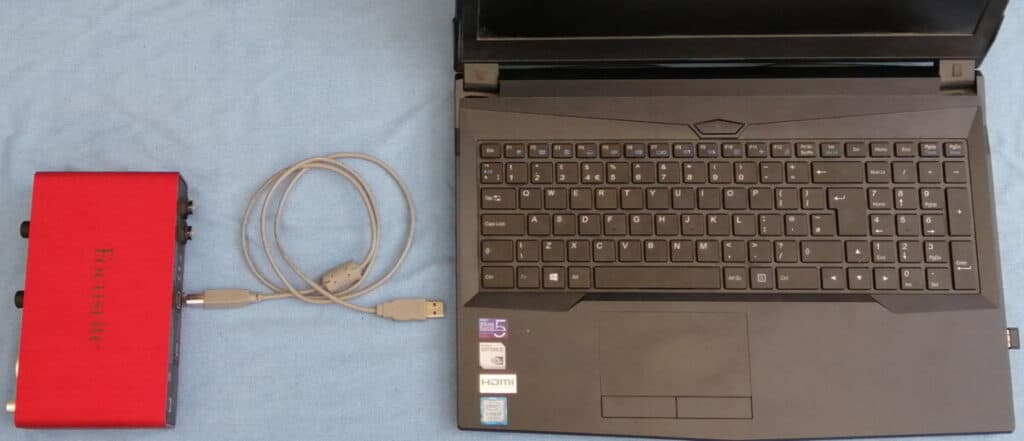
1 Connect audio interface to computer
Your audio interface will usually have come supplied with a cable to connect it to a computer. This is usually USB or Thunderbolt. Locate a free port on your computer, plug the correct end of the cable into it (there is usually only one way round it can go so you can’t really mess this up), and plug the other end of the cable into the port labelled USB, PC or computer on the interface.
Some interfaces require AC mains power, while others don’t. If yours does, don’t forget to plug the supplied power supply into a free wall outlet.
2 Install drivers for audio interface
As previously discussed, audio interfaces require specialized driver software to function at their best. These will usually be available for download from the manufacturer’s website, or sometimes installable from a disc supplied with the interface.
Often the drivers will come bundled inside a software utility e.g. Focusrite Scarlett interfaces have the “Focusrite Control” program that you install when you first plug in the interface. Other manufacturers have similar utilities. Sometimes when you plug the interface in, you will be prompted to download and install drivers for it. In any case, plugging the interface in then installing the utility software should be enough to make sure you get the drivers installed – just follow whatever on-screen instructions are given.
3 Connect microphones or instruments to inputs
Whatever source you are recording from, it’s time to plug that in.
For example, if you are recording vocals you will want to plug your microphone into one of the audio interface inputs, usually with an XLR cable. The same goes for if you are recording an acoustic guitar with a microphone, or recording an electric guitar by mic’ing up a guitar amp.
The other way to record audio is to directly plug a cable from an instrument into the interface, a so called D.I. (Direct Input). For example, to D.I. a guitar, plug one end of a standard jack cable into the guitar and the other end into a free input on the audio interface. Similarly, if you are recording a keyboard, plug one end of the cable into an audio output on the keyboard and the other end into an audio interface input.
This video shows in detail how to connect an electric guitar to a computer via an audio interface…
At this point it is important to set the input to Line or Instrument level if you are D.I.ing; a guitar will be instrument level, and a keyboard will be line level. This is usually done either in the interface’s software utility, or with switches or buttons on the interface itself.
Note that a lot of interfaces use dual-purpose input sockets – you can plug either an XLR or a jack cable into them; it’s pretty clever!
For you keyboard players out there, there is also the option of connecting via MIDI. For recording via MIDI, you need to connect a MIDI cable between the MIDI OUT on your keyboard and the MIDI IN on your audio interface or separate MIDI interface. For full details on how to connect a MIDI keyboard to a computer, see my “Does a MIDI keyboard need an audio interface?” article.
4 Connect headphones or monitor speakers
So you’ve got your input sorted; time to take care of the output.
This could be as simple as plugging a pair of headphones into a headphone socket on your audio interface. Some interfaces have more than one headphone socket to allow multiple musicians to listen. Some also have individual volume controls for each headphone socket, so remember to turn these up independently of the main volume control.
The other option is a pair of speakers. Connect these to a set of outputs on the interface; they are usually located around the back of the interface. The cables that you need will be determined by your particular speakers; you may require jack-jack cables, jack-phono cables or XLR cables. Check carefully what type you need before you part with your hard-earned cash.
Make a note of which outputs you connected your speakers to if your interface has multiple sets of outputs – we will need this information in the next section.
5 Configure DAW
Time to launch your DAW program, whether it’s Reaper, Cubase, Pro-Tools, Studio One, Logic Pro X, GarageBand or something else. If you haven’t installed your DAW yet, do that now.
There is a small amount of configuration we will need to do inside the DAW. This is mainly to do with telling it which inputs and outputs we are using on the audio interface, and making sure we are using the right drivers.
I’ll use the Audio Device Settings dialog from Reaper as an example, as that is the DAW I use and I am familiar with it. A similar place will exist in whatever DAW you use to configure the same settings…
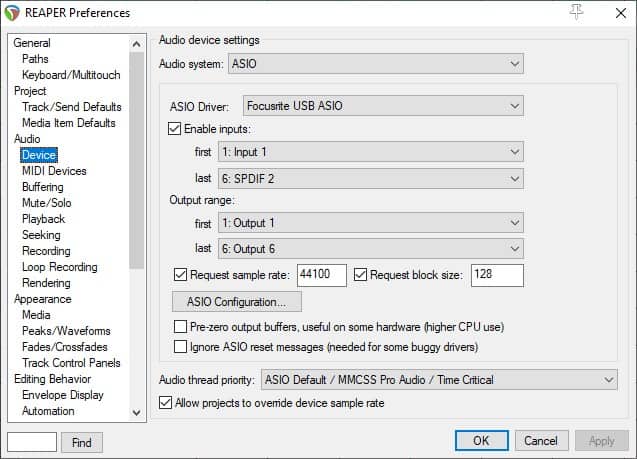
The important settings here are…
- Audio System – set to ASIO. This is the high-end audio system already discussed. The Mac equivalent is Core Audio.
- ASIO Driver – the audio driver for your audio interface. Should always be an ASIO driver on Windows.
- Enable Inputs – This is where you enable the inputs that the DAW has access to. In Reaper, you check the enable inputs box, then set a range accessible to the DAW. I have enabled all inputs here.
- Enable Outputs – Exactly the same as inputs, but this time for the outputs.
The process of recording your music at home
You’ve got all the equipment and software that you need, and it’s all set up. It’s time to press that big red record button! This section takes you through the process of actually recording your music on your computer. I’ll keep things quite general for 2 reasons…
- Everyone uses different DAWs. Although the process is pretty much identical for each DAW, the specifics of where the buttons and displays are will differ. I will use Reaper as an example where appropriate as that is the DAW I am personally most familiar with.
- Different instruments being recorded. The process for recording a track is the same whatever instrument you are capturing, but there are differences in how you might set-up for recording each instrument. A later section will point out some of these for specific instrument examples.
Now obviously you need something to record! Writing your own songs is one of those activities that is quite easy to get started with, but can get pretty difficult pretty quickly. I highly recommend reading my article on why songwriting is so hard. You’ll learn the reasons writing your own music can be difficult, and hopefully pick up a few handy tips and tricks to make it easier for you.
The 2 recording approaches
When you are recording at home, there are essentially two approaches, or mindsets, or attitudes you can have.
One is the songwriting approach; this is where you are recording as part of the process of writing your song. Here, you are aiming to get your ideas down as quickly as possible. If you don’t play a part perfectly, sing a note or two out of tune, or are a bit out-of-time with a part, that is perfectly ok. You are writing and developing your song here, not recording it for release.
The other approach is the tracking approach. You have already written your song and you know what the parts are. This time when recording, you are going to try and get everything as good as you possibly can. These are the parts that will go into your actual mix, and ultimately be released as the final song. If it takes 35 takes to get that guitar solo just right, then so be it!
I regularly use both approaches, including a hybrid mix of the two when appropriate.
In this section, I make multiple references to tracks. If you are not sure of what a track is, then you need to read my beginners’ guide to what a track is in music recording. You’ll learn exactly what a track is, why tracks are important and how to use them.
How to record a track in a DAW
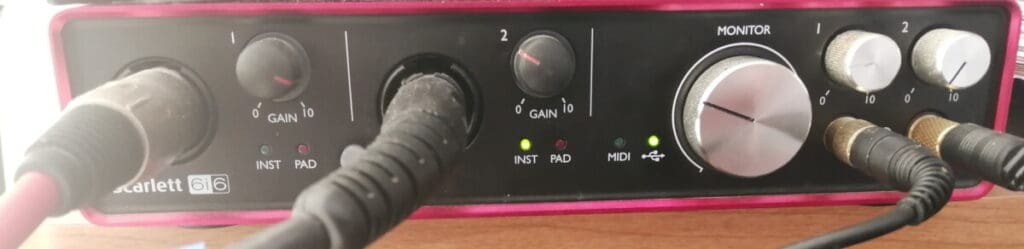
1 Set the levels on your audio interface
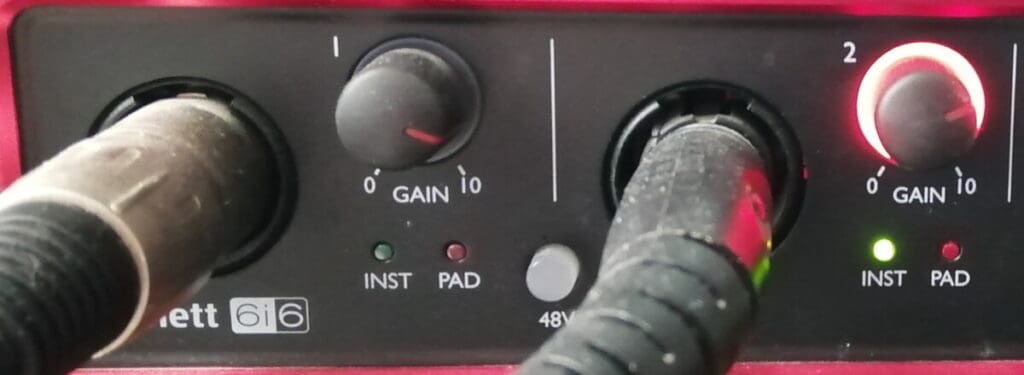
With your microphone or instrument plugged into one of your interface’s inputs, check that the recording level is loud enough, but not too loud as to cause “clipping” (unpleasant distortion and other audio artifacts caused by the signal level being louder than the hardware can cope with).
Play or sing as loud as you are going to in the loudest section of what you will record. Monitor the clipping indicator on your audio interface; there will be a LED or indicator of some kind (usually red) near the input. Keep turning up the gain for that input until the clipping indicator lights up. Then turn down the gain a bit. Repeat this process until when you are playing/singing the loudest, the clipping indicator does not come on. This ensures your input signal is just loud enough but not too loud.
We may turn this down further later when we set the levels inside the DAW in step 4.
2 Create a new track in the DAW
Launch your DAW program if you haven’t already. Create a new track; the way you do this will vary from DAW to DAW, but some common methods are…
- Double-click in the track area
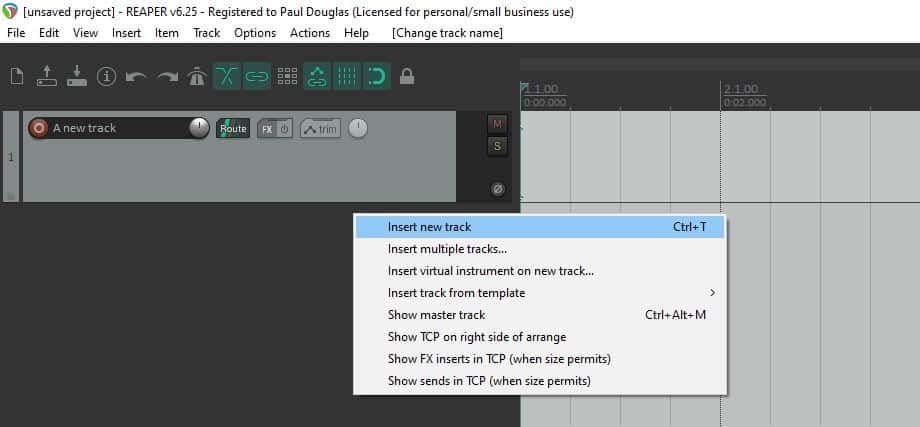
- Right click in the track area and select “New track”
- Go to the track menu in the application main menu bar and select Track->Insert new track
- Use the shortcut key to create a new track (in Reaper this is Ctrl+T on Windows)
In some DAWs you need to select which type of track you require. If you a recording from a microphone or DI, the track type will be audio. If you are recording a keyboard via MIDI, then choose a MIDI track type.
3 Set the track input(s)
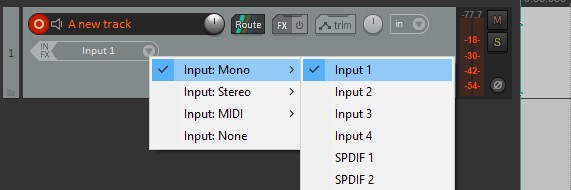
If your interface has more than one input, you need to tell the DAW which input you want to record from on the track. On the track there will usually be an input indicator of some kind where you can select which input you want to record from. Click this, and select the audio interface input your microphone or instrument is connected to.
Here in Reaper, you can see I have selected to record from Input 1 on the new track…
If you find after you have recorded a track that nothing actually seems to have been recorded, the first thing to check is whether you set the correct input to record from.
4 Set the levels in the DAW
Now we have our track set up for recording, we need to check the input levels on that track.
Launch the mixer view in your DAW if it isn’t already visible (in Reaper View->Mixer, or Ctrl+M). You should see a strip for your newly created track. Play or sing as loud as you are going to in the part you are recording, and monitor the level of the meter.
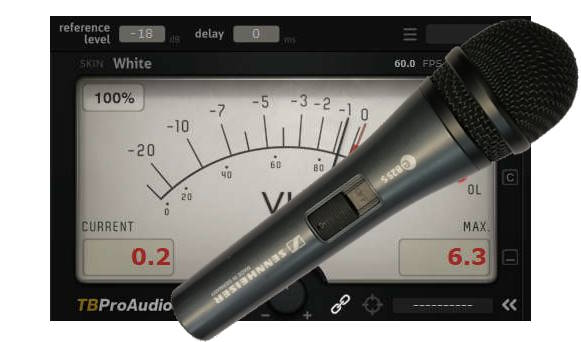
A good rule of thumb to aim for is the signal should go about ⅔ up the meter. Or, your signal should average about -18dB, and peak no higher than -15dB. Don’t get too hung up on this though – if your numbers are a little higher, that’s fine. Turn the gain for the input on your interface up and down accordingly, until you are happy with the level on the track.
Here are two examples from Reaper; the first one is a well-set recording level, whereas the second one is way too loud…


However careful you are with setting levels, you will never get everything recorded at exactly the same volume. That’s why gain staging is important. This is the process of getting all your tracks at a similar volume after they have been recorded. To learn how to do this, check out my gain staging in a DAW tutorial.
5 Set up monitoring
When you are recording, you may want to hear what you are singing/playing through your headphones. This will be especially true if you are using something within the DAW to get the sound you want e.g. an amp sim for an electric guitar. This hearing-what-you-are-playing is called monitoring.
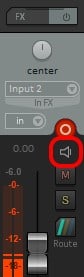
There are two possible ways to do this. One is to enable it within your DAW. On your new track strip in the mixer, there will be a button to enable monitoring. Highlighted with a red border below is the monitoring button on a track in Reaper…
The other way of monitoring, is to bypass the DAW entirely and use direct monitoring in your audio interface. This essentially sends the input straight back to the output i.e. into your headphones or speakers. You will be able to set this up on your interface, either with a button on the unit itself or in its software utility program. Consult your audio interface manual for how to do this.
I would recommend using DAW based monitoring if you can. I would only ever use direct monitoring if I was getting audio performance issues when using DAW monitoring.
6 Set the tempo/metronome/count-in if required
If you haven’t yet configured the tempo for your song, do that now. This is usually specified in bpm (beats per minute), and there will be somewhere in your DAW to set it. There may be a project settings window, or an indication at the bottom of the screen that you can click on and edit. Both of these exist in Reaper.

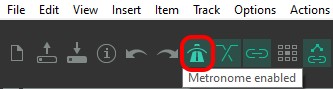
Now you have set the tempo, you might want to have a metronome to play along with to keep you in time. All DAWs have a metronome built-in; locate the button to do it in your DAW, and click it to enable the metronome. Often, there will be different sounds you can use and various configuration options. You may also be able to set a count-in here, so you will get a certain number of measures worth of clicks before recording starts.
In Reaper, if you right click the metronome button it allows you to configure different sounds and other settings.
7 Do a quick test recording
In my opinion, it is always worth doing a quick test recording. There’s nothing worse than recording a really good take, then listening back and realizing something was wrong – input level too low, wrong input selected, too much background noise, etc.
So just press the record button, play/sing any old thing, stop recording and just as a sanity check play back what you have recorded just to make sure everything is set up ok. Once you’ve confirmed that, you can then delete the part you just recorded ready to record a proper real take.
8 Set the project locator to the right place
You may not want to record right from the beginning of your project. There may be parts already recorded, and you want to start recording at a particular point to align with those parts. Simply click on the place in the main parts window in your DAW where you want to start recording from, and that will be where the part you record appears.

9 Record!
We’re ready to press the big red button! This is usually located on something called a “Transport bar“. This contains controls for record, play, stop, pause, etc. These operations will also have shortcut keys you can use instead; it is worth learning these, even if just the ones for record, stop and play. It will save you a lot of time in the long run.

Take a deep breath, press record and start playing/singing. When you have finished, click the stop button, then listen back to your part.
You can of course then repeat the process to record another track, then another, then another. This is how you build up the tracks to make a full song arrangement.
If you are a novice at home recording, you are probably wondering how long it will take to record a full song. You should check out my “how long does it take to record a song” article for details of what to expect. Obviously, there is no definitive answer here; the time taken wildly varies. But this article will give you a general guide on what to expect.
What order should I record my tracks in?
There is no right or wrong here. The order you record your tracks is going to depend largely on your preferred way of working, and what stage in your project you are currently in.
The following is a suggested order you could follow. This is by no means the only way, but is an order similar to how I have recorded many songs…
- Rough chord structure (this could be on a guitar or keyboard; it’s just to give a basic song structure as a guide)
- Rough (MIDI) drums
- Bass
- Guitars
- Keyboards
- Vocals
Once the above have been recorded, you can go back and delete the rough chord structure track. Then you could edit the rough drums track to fit in better with the rest of the song now you have the other tracks.
There is no right or wrong answer here. Check out my article on what to record first in a song for more details on the different approaches. This should help you come up with an order that works for you.
Recording specific instruments
Here are a few pointers for recording some specific instruments. These are not intended to be detailed tutorials, but should give you enough information to get started recording with each one.
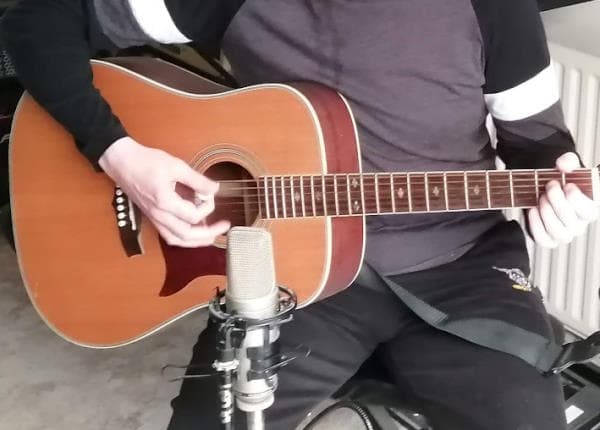
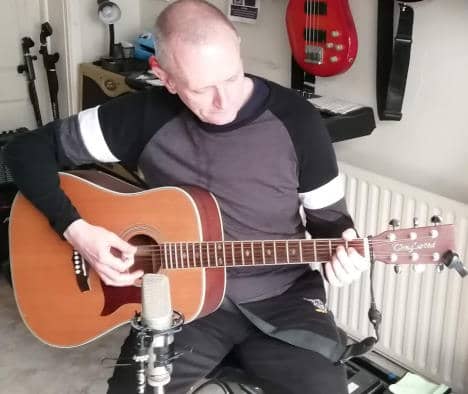
Recording acoustic guitar
I highly recommend using a microphone to record acoustic guitar, even if you have an electric-acoustic guitar that can be plugged directly into your audio interface. The sound quality from a microphone will be much better than from the D.I.
The trick when recording an acoustic guitar with a mic, is to not put the microphone too close to the guitar. It is also worth lining the microphone up with the sound-hole, then angling it to point roughly at the 12th fret. This helps with making the sound less “boomy”, and picking up some of the higher end sparkle from the strings.
My article on connecting an acoustic guitar to a computer has a lot more detail.
Recording vocals
If you are recording vocals, use a pop shield. This will help reduce the unpleasant pop sounds from plosives (‘p’ and ‘b’ type sounds).
Typically, you want to avoid reflections in the room as much as possible. These can emphasize certain frequencies too much, and end up with a vocal sound with too much presence in difficult to control frequency ranges. This can lead to an overly thick or harsh vocal sound. Try not to record in a corner. You can also try putting cushions, blankets, duvets, etc. behind you when you record. This will help deaden the sound and reduce reflections.
Don’t get too close to the microphone. Using a pop shield can help with this, as the closest you will be able to get to the mic is the distance the pop shield is placed from it.
Recording drums
You basically have 4 options for recording drums…
- Recording a real kit with microphones
- Recording an electronic kit with a D.I.
- Using drum simulation software to make drum parts
- Using drum loops
To record a real kit, you can actually get a pretty good result using just one microphone. Try placing the mic about 6 feet in front of the bass drum, about level with the height of the snare drum. Experiment with the height – move the mic higher to get more of the cymbals and a more trebly sound; move it lower for less cymbals and a thicker, bassier sound.
To DI an electronic kit is much the same as any other instrument. Plug one end of a jack cable into the line-out of the kit, and the other end into a free input on the audio interface.
Using drum simulation software involves adding the drum simulator as a plugin on a MIDI track in your DAW. You then drag MIDI drum patterns from the drum software onto the track in your DAW. You can then edit those parts very easily within your DAW if they are not quite what you want. It is a very quick, efficient way of building up drum parts. I highly recommend EZDrummer 2 for your first drum software if you have never used any before.
The final option is to use already recorded drums, by using drum loops. There are many, many of these available, both free and paid. Just google for “drum loops” to find millions of them. Be careful with licensing though; make sure that you have the rights to use them before using them in one of your projects.
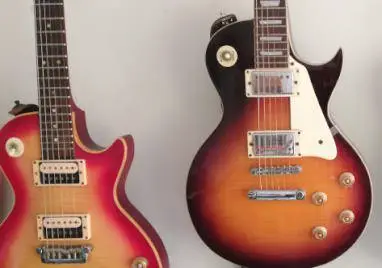
Recording Electric Guitar
There are two main options for recording electric guitar…
- Mic up a guitar amp
- DI the guitar and use amp sim software
To mic up a guitar amp, you simply put a microphone in front of the speaker of the amp and record it. Although it sounds simple, there is a lot to mic’ing up guitar amps – some engineers have spent literally years and years mastering this. Very small differences in mic placement can make huge differences to the recorded sound. As a starting guide, place the mic close up to the speaker grille, almost touching it, with the mic just off-center from the cone of the speaker. Experiment with the placement to get a sound you like.
My preferred way of recording electric guitar is to use amp sims. Here you directly plug the guitar into the interface, then use an amp sim such as BIAS FX, Amplitube or Guitar Rig to get the guitar sound you want. The Complete Guide To Recording Guitar With Amp Sims on this website goes into much more detail.
Recording Electric Bass
Everything said above above about recording electric guitar can also be said for recording electric bass.
However, there is another option – MIDI bass. There is some very good virtual bass MIDI software available – EZBass by ToonTrack is one I have personally used, and been very pleased with the results. You work with these just like with the drum simulation software; drag then edit MIDI patterns from the software plugin onto a track in your DAW. It’s a very quick way of getting bass into your song quickly, and for giving you ideas and inspiration.
Recording Keyboard
Your two options for recording keyboard are essentially audio and MIDI.
With audio, you simply DI from the line-out of your keyboard into an input on your audio interface.
With MIDI, you are essentially recording instructions to play notes, rather than the audio itself. In practice, you connect the MIDI OUT on your keyboard to the MIDI IN on your interface. You then record just as you normally would, but instead of audio waveforms you end up with MIDI patterns that are very easy to edit inside your DAW. I highly recommend recording keyboards using MIDI for the ease of editing they offer.
Consolidating tracks
Once you have recorded your tracks, you might want to give them to someone else to work on, perhaps to mix your song. If you plan to do this, definitely check out my article on consolidating tracks. This is a vital step you need to take to prepare your tracks for someone else to work on, especially if they are using a different DAW to you.
Good luck!
If you’ve made it this far in this article, I’m impressed! I hope you have picked up some useful information, that genuinely helps you in your music recording efforts. Obviously, there is a lot more to learn than is in this article, but armed with this guide you should be able to make a great start in the world of recording your own music at home.
Here is some of my favorite home studio gear…
Thanks for reading this article. I hope you found it helpful in your home music-making activities. Here are a few of the tools that I personally use in my home studio. These are affiliate links, so if you decide to use any of them I’ll earn a small commission.
Audio interface: My personal choice for audio interfaces are the Focusrite Scarlett series. I have been using these for years, and they have always given me great-sounding recordings. For a very reasonable price from Amazon you can buy the excellent Focusrite Scarlett 4i4, or if you don’t need MIDI capability the Focusrite Solo is a great choice.
Amp sim: Guitar amplifier simulator software has come on leaps and bounds in recent years, such that I record all my electric guitar parts using amp sims these days. One of the very best is the incredible Amplitube from IK Multimedia, which I have used on many of my songs.
Headphones for recording: My favorite headphones for recording are the Sony MDR-7506s, which I use for monitoring during all my recording sessions. They can also be found in many pro recording studios. Get the Sony MDR-7506 headphones from Amazon here.
General-purpose microphone: You can’t go wrong with a good ol’ Shure SM-57, one of the most versatile and ubiquitous microphones around. I’ve been using one in my home studio for as long as I can remember. Amazon offers the Shure SM-57 for a very competitive price.
To see all of my most up-to-date recommendations, check out this resource I made for you!