How to connect an acoustic guitar to a computer
DISCLOSURE: This post contains affiliate links. If you buy through these links, I may earn a small commission.
Connecting an acoustic guitar to a computer is usually done to record the sound of the guitar on the computer. In this sense “connecting” means getting a signal from the sound that your guitar makes, and ultimately capturing that sound in software.
To connect an acoustic guitar to a computer you can use a microphone in front of the guitar, plugged into a computer’s audio interface. You can also attach a pickup to the guitar, its jack cable plugging into the interface. Acoustic-electric guitars can plug straight into the interface.
Let’s go into some detail about all these methods. We’ll also consider why you would want to connect your acoustic guitar to your computer, and associated hardware and software that you could use.
If you are interested in checking out the best recording gear such as audio interfaces, studio monitor speakers, microphones, etc., you can find them at Amazon by clicking here.
What does “connect acoustic guitar to computer” mean?
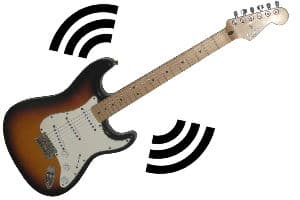
We want to get the sound from the acoustic guitar into the computer somehow. That is what “connection” means in this article. This could be via a direct physical connection from the guitar to the computer e.g. a cable connecting the guitar to the computer in some way. Or it could mean via some intermediate device e.g. a microphone, that is in turn physically connected to the computer.
However we do it, all these methods take the audio produced by the guitar and turn it into an electrical signal that can then be recorded or processed digitally on the computer.
Audio interfaces
Whatever method is chosen to connect the acoustic guitar to the computer, you will need an audio interface. There are ways of connecting without an audio interface (see later in this article), but I wouldn’t recommend them.
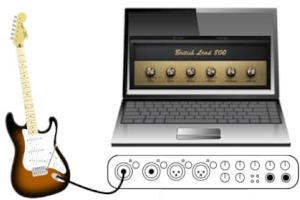
An audio interface is a unit that you attach to your computer usually via USB or thunderbolt. This unit has 1 or more audio inputs that you can plug audio sources into (e.g. microphone, cable from an instrument, etc). It will also have 1 or more sets of outputs for speakers, headphones, external amplifiers, etc. This is what takes the signal from our guitar and sends it into the computer to be recorded or processed in software.
There are a lot of audio interfaces available, and it can be difficult to determine the type of interface you need and how much money you should spend. My “how many audio interface inputs do I need” article will help you make that decision, and help you not spend any more money on an interface than you need to.
My personal choice for audio interfaces are the Focusrite Scarlett series. I have recorded 3 commercially released EPs using them, and they have always given me great-sounding recordings for not very much money. You can buy the Focusrite Scarlett 4i4 from Amazon (affiliate link) for a very reasonable price.
In addition to general audio interfaces designed for any audio signal, there are also guitar-specific interfaces available such as IK Multimedia iRig HD 2, Apogee Jam+, TC-Helicon Go Guitar Pro.
I wouldn’t recommend these for connecting an acoustic guitar to a computer, as they are mainly designed for electric guitar and are not usually designed for microphones/XLR cables, only jack cables. In addition, it’s likely in your home studio that you won’t just record guitar, so a general-purpose interface will give you more flexibility and will work well with acoustic and electric guitars.
Sometimes, you have worked your socks off connecting up your guitar, only to find there are annoying clicks and pops coming through the audio interface that seem to have come from nowhere. To help prevent these from happening, check out my how to stop interface clicks & pops article, and hopefully you’ll no longer have to deal with these unpleasant noises.
Using a microphone to connect to the audio interface
If you have a pure acoustic guitar (i.e. not an electric-acoustic guitar), connecting a cable straight from your guitar is obviously not an option – there is nowhere on your guitar to plug in a cable!
So the most common method of connecting to a computer for a pure acoustic guitar is to use a microphone placed in front of the guitar.
Incidentally, you may be interested in connecting multiple microphones to your interface, for example if you are recording an acoustic guitar and a singer at the same time. If so, definitely check out my article on connecting multiple microphones to a computer. You’ll learn the different ways to connect more than one mic, and it will walk you through the best method for your personal requirements.
Place the microphone 6 to 12 inches away from the sound-hole of your guitar, but angle it towards the 12th fret. Obviously, you will need some sort of microphone stand to hold the mic steady, although you can improvise with a table or a chair.
This video does a great job of illustrating the effect that different microphone angles can have on the sound captured from an acoustic guitar.
When you have your microphone in position, one end of an XLR cable plugs into the microphone, and the other end plugs into an input on your audio interface. With the audio interface connected to your computer via USB, thunderbolt, etc. that’s it – you have the sound coming from your guitar going into your computer.
For more information check out my article on recording acoustic guitar with a microphone. You’ll learn in detail about microphone placement, location in the room and basic room treatment that will help you capture the very best sound possible.
Does it matter what microphone you use?
In all honesty, it doesn’t really matter what microphone you use. I’m sure some audio professionals will vehemently disagree with that statement! I think there are many other factors, especially in a home studio, such as the acoustics of the room, microphone placement, condition of the guitar strings, etc. that make much more of a difference to the quality of sound going into the computer.
I’m a firm believer that the best microphone is the one you already have. If all you have is a cheap $20 mic you bought from a consumer electronics store, use that. You can upgrade to a better mic later if and when you have the money.
It is generally believed that the best results are obtained using a condenser microphone. But don’t think that is the only option – far from it. I have got great results using a good old standard Shure SM57 dynamic mic. If you’re interested, check out my article taking a detailed look at the SM57 on acoustic guitar. You can also check out my recommendations for microphones in general.
Using a separate pickup to connect to the audio interface
You might be thinking that for a pure acoustic guitar, the microphone-into-interface method is your only option. But there is another way – using an acoustic guitar pickup.
You can buy pickups for acoustic guitar. These perform a task similar to the pickups on an electric guitar. You attach the pickup to the guitar in some way, and it turns the sound from the vibrations of the strings into electrical signals. The pickup will have a jack cable coming out of it, and you plug this into one of the inputs on your audio interface.
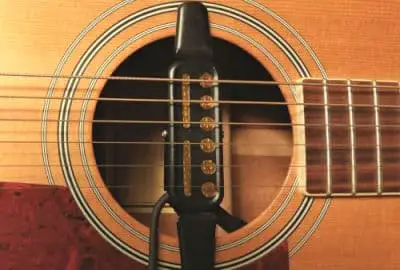
This picture illustrates one type of acoustic guitar pickup – a magnetic pickup. These are generally the easiest type to install as they just clip onto the guitar.
You can also get Piezo and internal microphone pickup systems. These are more difficult to install, and may require taking your guitar to a professional.
Directly connecting an acoustic-electric to the audio interface
If your acoustic guitar is an electric-acoustic guitar, then you have a third option. You can take a jack cable, plug one end into your guitar and plug the other end into your audio interface. This is similar to the pickup option for acoustic guitar above, but with the physical pickup already built into the guitar.
This is the easiest option if you have an acoustic-electric guitar.
Combining microphone and direct connection methods
It is also possible to combine the above methods. For example, if you have an acoustic-electric guitar you could record the sound coming from the microphone in front of it, and from a cable directly plugged into the interface from the guitar.
These sounds could then be blended in software, such as a DAW (Digital Audio Workstation). This way, you would get the unique sound quality of 2 different ways of recording the sound, such as the natural sound from the microphone and the clean character of the direct connection. You would then have the flexibility of combining the two to taste, according to your personal preferences.
The downsides to this method are that it takes up two inputs on your interface, and you have two connections to configure, increasing your setup time.
Recording an acoustic amp
It is common with electric guitar to place a microphone in front of a traditional guitar amplifier, and connect the mic XLR cable to the audio interface. Sometimes an amp will have a line-out socket that you could run a cable from into your interface instead of using a microphone.
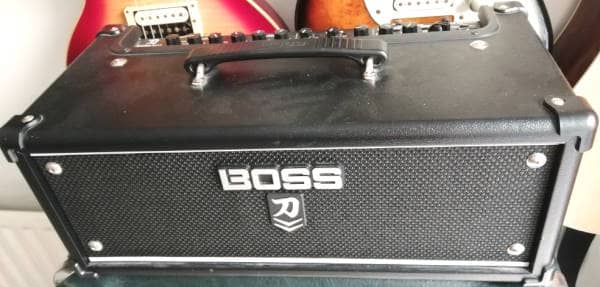
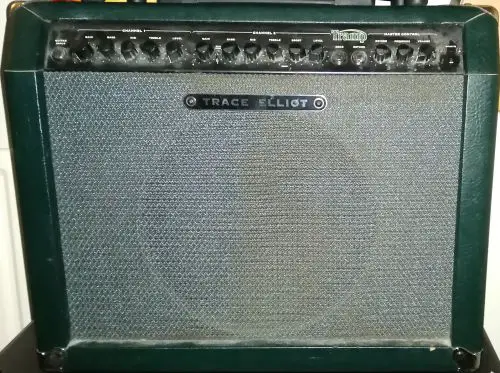
You can also buy acoustic guitar amplifiers. These are commonly used when playing acoustic-electric guitars live, to increase the volume to performance levels at a venue.
This gives us another option on how to connect an electric-acoustic guitar to a computer. You could connect your guitar to the amp using a standard jack cable, then either mic up the amp or use the line-out connection. The XLR cable from the mic or the jack cable from the line-out would then connect into an input on your interface.
To be honest, this method is not very commonly used. You would have to really like the sound of your acoustic guitar amp to go through the extra hassle of setting up another piece of equipment. Maybe you have some effects pedals that you love the sound of on your acoustic guitar going through an amp, and that is the sound that you want to capture.
It is far more common to connect directly to the interface, rather than go through an intermediate amplifier.
I have a whole article on connecting a guitar amp to a computer. This is recommended reading if you are going to be connecting your amp to your audio interface in some way, whether for recording or for some other purpose.
Setting levels
Once you have your connection from your guitar to your computer, you may think you are finished. But you have one more job to do to set up your connection – you need to set the levels correctly both on your audio interface and in whatever software you are using.

This is necessary is to prevent clipping (the signal volume going louder than the input can cope with producing unpleasant distortion), but to have a loud enough signal to hear the guitar clearly over any background noise.
You control the level of the signal going into your interface with the gain or input level knob for the input you are connected to. Start with the gain low, then begin playing your guitar as loud as you are going to get in your recording.
As you are playing, slowly start turning up the gain on the interface, until it starts to clip. There will be an indication on your interface to show clipping, usually a red LED or light surrounding the gain knob. Back the gain off a little, until it stops clipping. This is the optimum level for your connection.
If you are using software to record or process your guitar’s sound, perform a similar action with the level inside your software. On a traditional channel strip style dB meter, make sure the signal isn’t going into the red. If you are recording, try to make sure the level does not peak above -10dB.
This is just a brief overview of setting levels. For more detailed coverage of this very important topic, I have a guide to getting guitar recording levels right every time, which is highly recommended reading for anyone doing any sort of guitar recording.
Comparison of acoustic guitar to computer connection methods
My recommendation is out of the above methods whenever you can, choose the microphone in front of the guitar method. Even if you have an acoustic-electric guitar that can plug straight into your interface.
The reason I say that is for the quality of sound obtained. Using a microphone is by far the best way to capture the natural sound of an acoustic guitar. The other methods can give a good sound, but it will not sound the same as listening to someone play a guitar acoustically in a room.
That’s not to say that the microphone method doesn’t have its drawbacks. The microphone will pick up any background noise, something that a direct cable connection will not. It will also potentially pick up the tiniest movement of the guitar player, such as moving slightly on a seat, or the breath of the guitarist. And you have to be very careful with how to place and orient the microphone to get the best sound.
This table compares the different methods of connecting an acoustic guitar to a computer….
| Connection method | Advantages | Disadvantages |
| Microphone in front of guitar | – Excellent natural sound quality | – Picks up background noise – Cost of extra equipment (mic) |
| Using an acoustic guitar pickup | – No background noise picked up | – Cost of extra equipment (pickup) – Variable sound quality |
| Acoustic-electric direct connection | – No background noise picked up – Easiest setup | – Potentially unnatural sound |
| Using an acoustic guitar amp | – The unique sound of the amp/effects pedals | – Cost of extra equipment (amp) – Not really necessary |
Cost of the different connection methods
We have touched on the cost of the different methods in the above section, but let’s go into a little more detail.
Let’s assume you own an acoustic guitar and a computer. If you’re planning to connect your acoustic guitar to your computer, then buying the equipment that you need if you don’t already own it will be the first step you need to take.
The cheapest method would be if your acoustic guitar is an electric-acoustic guitar and you use a direct connection to an interface. In this case, all you need is an interface and a jack cable. Lets say $120 for a good quality but fairly entry-level interface, and $20 for a good quality cable. That gives us $140.
To use a pickup, you would need the pickup itself and an interface. As you can imagine, prices for guitar pickups vary immensely. But you should be able to get a pretty good one for about $80. Adding that to the $120 for the interface, that gives us $200.
Using a microphone to capture the sound of the guitar, we have the cost of the microphone. I’m going to pick a standard Shure SM57 or similar dynamic microphone, which you can get for about $100. Add in the costs of the interface ($120) and a good quality XLR cable ($20), and we have $240.
Finally, using an acoustic guitar amp. We need everything in the above using-a-microphone method (assuming we a mic’ing up the amp), plus the cost of the amp itself. I’m going to budget $300 for a good quality acoustic amplifier. That totals up to $540.
Obviously if you already own some of the equipment, you can knock that cost off the total. Let’s sum these costs up in a table…
| Connection method | Equipment required | Cost |
| Microphone in front of guitar | – Interface ($120) – Mic ($100) – XLR cable ($20) | $240 |
| Using an acoustic guitar pickup | – Interface ($120) – Pickup ($80) | $200 |
| Acoustic-electric direct connection | – Interface ($120) – Jack cable ($20) | $140 |
| Using an acoustic guitar amp | – Interface ($120) – Mic ($100) – Amp ($300) – XLR cable ($20) | $540 |
In my opinion, the acoustic guitar amp method is overkill, and I wouldn’t spend the extra money. I think you can get a better sound using a microphone in front of the guitar, and this is the method I would choose. I think it is worth the extra cost over the pickup or direct connection methods.
Intention
Now you have your acoustic guitar connected to your computer, what are you going to do with it?
The most common reason for wanting to connect an acoustic guitar to a computer is to record it. This could be to quickly capture a song idea you just had. Or maybe you are actually recording a song you have written, as part of a full mix. In either case, all the methods here apply, although if you are recording a song “for-real”, you may take more care to get a really good sound.
You will need a DAW (Digital Audio Workstation) software application to record your guitar. These range from the simple and free (e.g. Audacity), up to full pro-level DAWs such as Reaper, Cubase, Pro-Tools, etc. I have a page on this website detailing my DAW recommendations for a home studio.
You could also be connecting your guitar to process the sound in some way, maybe to use some effects provided by amp sim software. You could use an acoustic amp model in an amp sim to turn your computer into an acoustic guitar amplifier. Again, all these methods will be appropriate here, although you would have to be careful with feedback from speakers attached to the computer if you are using a microphone.
The amp sim would allow you to apply all sorts of effects to your acoustic guitar, and sculpt the sound in a variety of ways provided by the software. Feel free to check out my amp sim recommendations page.

Connecting without an interface
All the methods considered above use an audio interface external to the computer to connect the acoustic guitar.
It may be possible to connect to a computer using its mic socket. For example, you could take a ¼ inch jack to mini jack cable, plug the ¼ inch end into an acoustic-electric guitar and the mini-jack end into the mic socket on your computer.
This method is not recommended. The standard consumer-level mic input on a computer is not optimized for high-fidelity audio signals such as those from guitars or microphones.
Audio interfaces contain high-quality pre-amps on their inputs, giving the computer the best quality signal they can. Interfaces also come with specialized pro audio drivers, which in addition to giving the best sound quality, will help reduce latency when digitally recording with a computer.
Here is some of my favorite home studio gear…
Thanks for reading this article. I hope you found it helpful in your home music-making activities. Here are a few of the tools that I personally use in my home studio. These are affiliate links, so if you decide to use any of them I’ll earn a small commission.
Audio interface: My personal choice for audio interfaces are the Focusrite Scarlett series. I have been using these for years, and they have always given me great-sounding recordings. For a very reasonable price from Amazon you can buy the excellent Focusrite Scarlett 4i4, or if you don’t need MIDI capability the Focusrite Solo is a great choice.
Amp sim: Guitar amplifier simulator software has come on leaps and bounds in recent years, such that I record all my electric guitar parts using amp sims these days. One of the very best is the incredible Amplitube from IK Multimedia, which I have used on many of my songs.
Headphones for recording: My favorite headphones for recording are the Sony MDR-7506s, which I use for monitoring during all my recording sessions. They can also be found in many pro recording studios. Get the Sony MDR-7506 headphones from Amazon here.
General-purpose microphone: You can’t go wrong with a good ol’ Shure SM-57, one of the most versatile and ubiquitous microphones around. I’ve been using one in my home studio for as long as I can remember. Amazon offers the Shure SM-57 for a very competitive price.
To see all of my most up-to-date recommendations, check out this resource I made for you!