
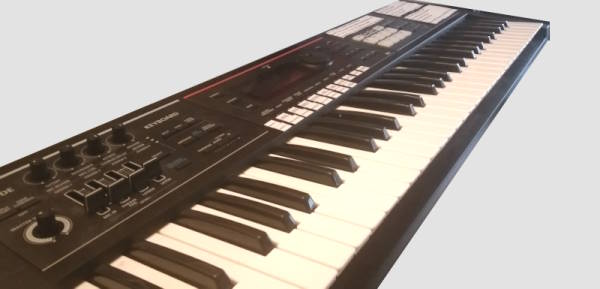
MIDI keyboards have been a part of my home studio since I first started home recording in the late 1990s. Whenever I have worked with MIDI a MIDI keyboard has proved its worth many times over, making creating MIDI parts so much easier.
As a general rule, it is worth having a MIDI keyboard in your home studio. Recording MIDI parts played on a keyboard is far easier than entering them in a piano roll editor or on-screen keyboard. Parts recorded from a keyboard also avoid sounding robotic, having been played by an actual human being.
Personally, I cannot imagine working with MIDI without using a keyboard. Let’s take a look at what a MIDI keyboard enables you to do that you couldn’t do without it. We’ll also see what MIDI work is made an awful lot easier with the use of a physical keyboard.
If you are new to home recording, I highly recommend you check out my beginner’s guide to recording music at home. A huge amount of work has gone into this guide! It is a complete resource to take you from never having recorded before all the way through to making your first home recording.
If you are interested in checking out the best recording gear such as audio interfaces, studio monitor speakers, microphones, etc., you can find them at Amazon by clicking here.
Recording MIDI keyboard parts
Do you have any keyboard playing ability at all, whether that is being trained as a classical pianist, or just knowing how to play a few chords that you taught yourself? If so, a MIDI keyboard is one of the most useful items you can have in your home studio!
If I ever want to record a piano or other keyboard part, I always record it over MIDI using my digital piano (which is a MIDI keyboard), rather than recording the audio. MIDI just offers so many advantages over audio…
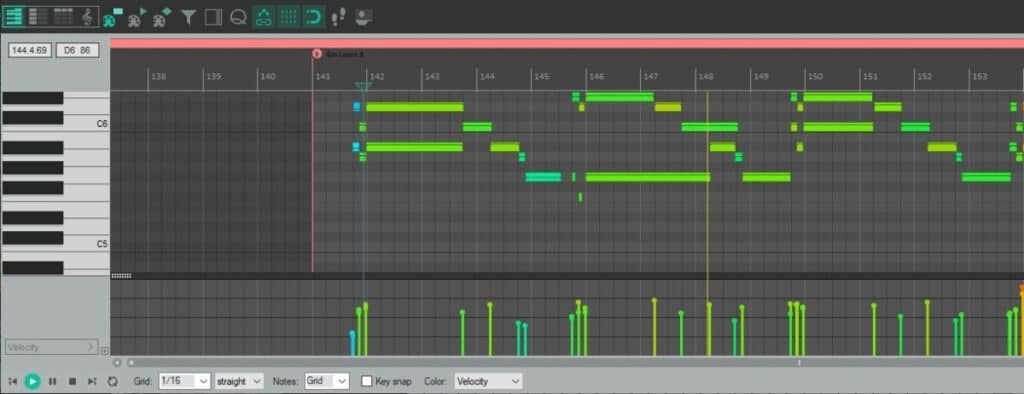
Recorded MIDI easier to edit than audio
Supposing you recorded a piano part and it was a great performance except for one note where you played a B♭ instead of a B. With MIDI, just move the B♭ up to a B in the piano roll editor, and it’s fixed! No one is any the wiser, and it just sounds like you always played a B.
Similarly, supposing your timing was off on one chord you played in the part, and you played it too early, well ahead of the beat. With MIDI, you can just move the notes in the chord back to be on the beat. Instant timing fix!
Quantising can do a similar job for the whole recorded part. It moves everything you played closer to being aligned with whatever timing granularity you specify e.g. quarter notes, eighth notes, sixteenth notes, etc.
While these things are not impossible to do with audio, they are an awful lot more difficult. With MIDI, it is incredibly easy.
It’s not always immediately obvious how you connect your keyboard to your computer to record via MIDI. Check out this article on connecting a hardware synth to a computer for help with this, and to learn the equipment you will need and how to connect it all together.
Playing a keyboard easier than manually entering MIDI
The MIDI piano roll editor is an excellent tool for making minor edits to MIDI parts. However, if you are trying to enter a full MIDI part using only the editor, this becomes incredibly time-consuming and frustrating for all but the simplest of parts.
Imagine trying to enter a lengthy piano part this way. It would take you hours and hours, if not days and days!
If you play the piano part on a MIDI keyboard instead, the time it will take you is however long the piano part lasts. OK, you might have to do some re-takes and fix some mistakes, but that is still a huge time saving over manually entering all the notes.
Using an on-screen keyboard is only slightly better than entering the notes manually in the editor. You just can’t beat playing the part on a real keyboard.
There are several different types of MIDI keyboard – synthesizers, workstations, digital pianos, etc. If you mainly play piano, you may well want to invest in a digital piano to use both as a piano and a MIDI keyboard. If you are in the market for a digital piano, this article looking at how much should you spend on a digital piano should help you choose no matter what your budget is.
Can completely change the sound after recording
If I record a keyboard part, say a piano, using audio, I am stuck with that sound on the recording. Sure, I can add a few effects to alter the characteristics of the sound. But it is still a piano.
If I record the same part using MIDI, the sound that the recorded MIDI plays could be anything I want it to be. Using virtual instruments, I could change that piano into an organ, brass, lead synth, strings, whatever I wanted.
This is another example of the flexibility that recording using a MIDI keyboard gives you.
Now if you are recording MIDI into a DAW running on a computer, the MIDI keyboard is not all you will need. You may also need a MIDI interface connected to your computer, and a MIDI cable to connect the keyboard to the interface. Some MIDI keyboards can connect to your computer over USB.
To further confuse things, some audio interfaces have a MIDI interface built into them. Check out my article on whether a MIDI keyboard needs an audio interface to clear up any confusion, and see whether you need to buy a MIDI interface or not.
If you are looking for an audio interface with built-in MIDI, I highly recommend the Focusrite Scarlett 4i4 (affiliate link), available from Amazon for a competitive price. I have been using one in my home studio for years, and it has always given me great recordings via both audio and MIDI.
If you need a standalone MIDI interface, this one from Amazon will be perfect – the FORE MIDI to USB interface (affiliate link). For a very small amount of money, it allows you to connect the MIDI ports on your keyboard to your computer, with nothing else required!
Humanizing your MIDI parts
When you enter a MIDI part manually in a piano roll or other editor, all the notes you enter are exactly at the place where you put them. i.e. Exactly on the beat, or quarter note, or sixteenth note, etc.
This leads to your parts sounding robotic and devoid of any expression. This is because when human beings play music, they do not play with perfect timing. They play a little ahead sometimes, a little behind some other times. This is what makes music sound “human”, and gives it expression and emotion.
By playing the parts on a MIDI keyboard instead, you inject this human element back into your song. This allows you to, for example…
- Play with a swing feel
- Play deliberately behind the beat to give a laid back feel
- Give an urgent feel by deliberately playing ahead of the beat
- Play in a “rubato” style (increasing and decreasing tempo for expression), against the beat
- Delay a note for dramatic effect, when a phrase resolves on the first beat of a bar
It’s not just keyboard parts you can apply this to. You can play drum parts on your MIDI keyboard too, and add that human element to your rhythms rather than relying on robotic-sounding MIDI drum loops.
As a side note, you may be reading this article because you are considering putting together a home studio setup with a MIDI keyboard as part of it. If so, then definitely check out my “Can a MIDI keyboard be used as a regular keyboard?” article. You’ll learn all about the capabilities of MIDI keyboards and what else you can use them for, giving you the option to use your keyboard for multiple purposes.
Adding more capabilities to your MIDI keyboard later
After you buy a MIDI keyboard, you can add features and capabilities later on, as you can afford them. This expandability is one of the great advantages of a system based on MIDI.
For example, you may buy a MIDI keyboard and a software piano virtual instrument, allowing you to play and record MIDI piano parts on your computer. Then later, you buy an organ virtual instrument, so you can now record MIDI organ parts. Then perhaps an orchestra virtual instrument, then a synth…etc. You get the idea.
You can also buy hardware sound modules that can be played over MIDI, rather than just software to use on your computer. These are great for live use, if you want to turn your pure MIDI controller keyboard into an instrument that can be played in front of an audience. Simply connect your keyboard to the sound module via MIDI, then the sound module audio output to the P.A.
If you want to know more about virtual instruments, I wrote an article about VST plugins which should explain what they are and what they do.
The different types of MIDI keyboard
Pure MIDI controller keyboards do not output any sounds of their own. All they do is send MIDI messages when keys are pressed, and are designed to be connected over MIDI to something that does output audio. This could be a software virtual machine running on a computer, or a hardware sound module.
Other MIDI keyboards output their own audio, in addition to the MIDI capabilities described above. An example is a typical digital piano. My digital piano has its own sounds and outputs these through its speakers. It can also play other MIDI devices when connected to them via its MIDI output port.
MIDI keyboards come in all shapes and sizes, to suit all abilities, styles and budgets.
If you are a piano player, you are likely to favor a digital piano with MIDI capability. These have full-size 7-and-a-bit octave keyboards. They also have semi-weighted or fully-weighted keys, to try to emulate the feel of playing a traditional acoustic piano.
If you’re looking for a starter digital piano with MIDI, you could do a lot worse than the Alesis 88 Beginner Digital Piano/Keyboard (Amazon affiliate link). This has semi-weighted keys so it doesn’t feel exactly like a piano, but most pianists will feel relatively at home. This is a perfect first MIDI keyboard for a piano player looking to get into MIDI recording, and is available from Amazon for a great price.
If you’re more of a synth or keyboard player, you may be more suited to a pure MIDI controller keyboard with non-weighted keys. These keys are easier to press down than the weighted keys found on digital pianos.
If you are a one-finger synth lead lines player, a small 2-octave keyboard may suit you just fine. For more expansive players, investing a bit extra money for a 4 or 5-octave model will almost certainly be worth it.
The AKAI Professional LPK25 (Amazon affiliate link) is a small 2-octave MIDI keyboard, available from Amazon for a great price. This is ideal if you need a small keyboard for recording simple synth lines.
The Alesis Q49 MkII (Amazon affiliate link) is a larger 4-octave keyboard, ideal for keyboard players looking to play a little more expansive keyboard parts, perhaps more chord-based. This is an excellent choice for a good all-round keyboard, that should last you years.
What if I only record rock guitars?
If you truly only ever record rock guitars, then perhaps a MIDI keyboard isn’t for you.
However, do you really think you will never want to record anything with a keyboard? I have recorded a lot of rock music, and I have often added organs and pianos to those tracks. The occasional strings and pad synth parts have found their way into my rock songs as well.
I have also used a MIDI keyboard to play bass parts. There are some excellent MIDI bass virtual instruments available these days such as EZBass by Toontrack. These are a genuinely viable alternative to bass guitar parts.
I think a MIDI keyboard would add another tool to your collection of music-making utilities. It may not be something you would use on every song, but very handy when that particular song does need it.
Songwriting using a MIDI keyboard
The final application for a MIDI keyboard I’ll talk about in this article is songwriting.
MIDI keyboards are a great tool for quickly trying ideas, and working out what works and what doesn’t when writing songs. They enable you to…
- Quickly try out combinations of notes & chords
- Try out different sounds to see which inspires you or fits with your song idea
- In conjunction with a DAW quickly layer parts so you can see what sounds good together
Here is some of my favorite home studio gear…
Thanks for reading this article. I hope you found it helpful in your home music-making activities. Here are a few of the tools that I personally use in my home studio. These are affiliate links, so if you decide to use any of them I’ll earn a small commission.
Audio interface: My personal choice for audio interfaces are the Focusrite Scarlett series. I have been using these for years, and they have always given me great-sounding recordings. For a very reasonable price from Amazon you can buy the excellent Focusrite Scarlett 4i4, or if you don’t need MIDI capability the Focusrite Solo is a great choice.
Amp sim: Guitar amplifier simulator software has come on leaps and bounds in recent years, such that I record all my electric guitar parts using amp sims these days. One of the very best is the incredible Amplitube from IK Multimedia, which I have used on many of my songs.
Headphones for recording: My favorite headphones for recording are the Sony MDR-7506s, which I use for monitoring during all my recording sessions. They can also be found in many pro recording studios. Get the Sony MDR-7506 headphones from Amazon here.
General-purpose microphone: You can’t go wrong with a good ol’ Shure SM-57, one of the most versatile and ubiquitous microphones around. I’ve been using one in my home studio for as long as I can remember. Amazon offers the Shure SM-57 for a very competitive price.
To see all of my most up-to-date recommendations, check out this resource I made for you!
