How do I connect a hardware synth to a computer?
DISCLOSURE: This post contains affiliate links. If you buy through these links, I may earn a small commission.
Many of us, including myself, have hardware synthesizers or music keyboards in our home studios. With music recording and other software so powerful and easy to use these days, how can we make the most of our setups by connecting our hardware synths to our computers?
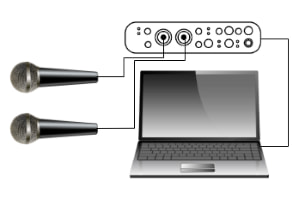
To connect a hardware synth to a computer, plug a jack cable into the synth’s line-out. Plug the other end into an audio interface, connected to the computer via USB. Or, plug a MIDI cable into the synth’s MIDI OUT, and the other end into the MIDI IN on a computer’s MIDI interface.
It is not immediately obvious how to connect a synth to a computer. There are a few pitfalls you can fall into such as not having the right equipment, choosing the wrong ports to connect up, and picking the right method appropriate for what you are intending to do. Read on to discover how to connect them together simply and without any fuss every time.
If you are interested in checking out the best recording gear such as audio interfaces, studio monitor speakers, microphones, etc., you can find them at Amazon by clicking here.
The 2 main ways to connect a synth to a computer
You can connect a hardware synth to a computer via 2 different methods…
- Audio – your synth sends the sounds it produces over a cable to your computer. The sound gets converted to an equivalent electrical signal, which can be recorded or processed by software.
- MIDI – your synth sends digital instructions to your computer to play some notes at particular times, for a particular duration. These instructions can then be used to play software instruments in your computer. They can also be captured (recorded) and played back on a software or hardware instrument.
Which method you choose will be determined by the reason you are connecting them.
I highly recommend you read my article on if a MIDI keyboard needs an audio interface. It helps you decide if you will need an audio interface for your own MIDI keyboard setup, and what the alternatives are to connect up your keyboard.
Reasons to connect your synth to your computer
There are 3 main reasons to connect your hardware synth to your computer…
- Recording: Recording can be done over either audio or MIDI. With audio, you will be recording the actual sound that the synth makes. So if it is set to an electric piano sound, that is what you will record. With MIDI, you are capturing instructions to play certain notes. This recorded data can then be used to play any instrument inside your computer.
- Play a software instrument: There are many, many virtual instruments available today for our computers. If you want to play one of these using your synth, then you will need to connect over MIDI.
- Computer plays your synth: Your computer can playback recorded MIDI data on your synth. To do this, a MIDI connection will be required.
Equipment needed to connect a synth to a computer
In this section for your convenience, I have detailed in one place all the equipment needed to connect your synth to your computer. All the links here are affiliate links, where I will make a small commission if you choose to buy through those links.
For an audio connection, you will need…
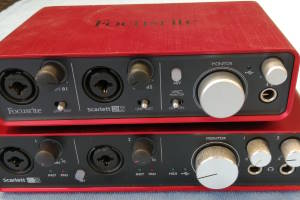
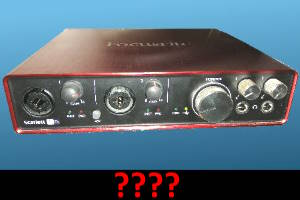
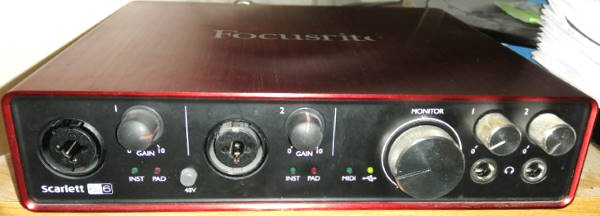
- An audio interface – I recommend Focusrite Scarlett interfaces. They last for years, are very reliable and give great sounding recordings. You can buy the Focusrite Scarlett Solo from Amazon (affiliate link), which will do the job. However, I would actually recommend the Focusrite Scarlett 4i4 (affiliate link), which also has a built-in MIDI interface. This means if you ever decided to do MIDI recording, you wouldn’t need to buy a separate MIDI interface. They are both available from Amazon for a great price.
- A jack cable – It is always worth spending a little bit more money on a high-quality cable; cheap cables are almost always a false economy. A good cable should last you for decades. I have been using D’addario cables (affiliate link) for years, and have never had an issue with them.
For a MIDI connection, you will need…
- A MIDI interface – as above, I would actually recommend buying an audio interface with a MIDI interface built-in. This will enable you to do audio recording as well, and will be probably cheaper than buying 2 separate units and will take up less space. The Focusrite Scarlett 4i4 (affiliate link) is highly recommended for this application.
If you do want just a MIDI interface, a great value option is this one from Amazon – the FORE MIDI to USB interface (affiliate link) - A MIDI (5-pin DIN) cable – again, it’s always worth spending a bit more on good cables. I’m always amazed how musician’s spend $1000s on instruments and equipment, yet connect them together with very cheap, poor quality cables. This Roland Gold Series cable (affiliate link) should last you for many, many years.
Some synths allow you to send MIDI over just a USB cable plugged into a spare USB port on your computer, without a separate interface. This type of connection uses a cable identical to that used to connect a printer to a computer. This Akoada cable (affiliate link) will be ideal for this purpose.
As a side note, you may be reading this article because you are considering putting together a home studio setup with a MIDI keyboard as part of it. If so, then definitely check out the following articles, where you’ll learn all about the capabilities of MIDI keyboards and what other applications they can be used for…
- Can a MIDI keyboard be used as a regular keyboard?
- Is a MIDI keyboard worth it? A guide to what it can do!
How to connect a synth to a computer over audio
Let’s assume you want to connect your synth to your computer for recording. As described earlier, you will need an audio interface.
Now, you may be asking “But my computer has a mic socket; why can’t I just plug my synth into that with an appropriate jack cable?”
Well, you could, and it would probably work to some degree. But you will not get the best performance, and are likely to be disappointed with the results.
The problem is that consumer-grade mic sockets are not designed to work with high-performance audio hardware and software. The audio drivers for it are likely to be not great, the components cheap and low-quality, you will suffer from poor sound quality.
Audio interfaces are specifically designed for this application. They have high-quality components, drivers specially designed for high-performance audio, and will give you much better results and sound quality than using a built-in mic socket. Do yourself a favor and get an audio interface (affiliate link)!
Here are the steps to connect your hardware synth to your computer via audio…
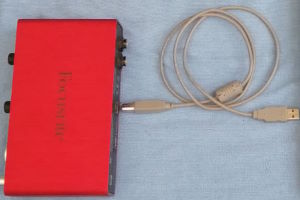
1 Connect audio interface to computer with USB cable
Your audio interface is usually connected to your computer via USB or Thunderbolt. Audio interfaces usually come with an appropriate cable; this is usually the same type that you would use to connect a printer to your computer.
Find a spare USB port on the computer, and plug in the cable. Take the other end and plug into the Audio Interface USB port.
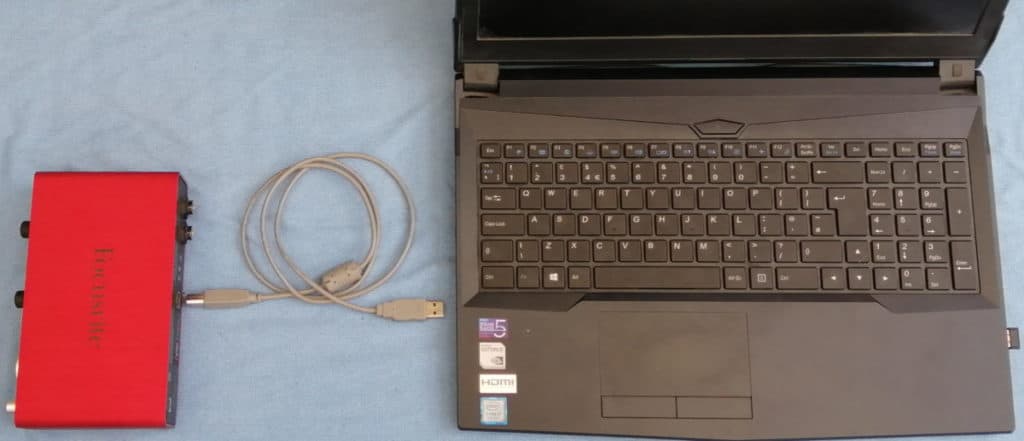
Be sure to follow any setup instructions that come with your interface, such as installing drivers for it.
2 Connect synth line-out to audio interface input with jack cable
Using a good quality standard jack cable, connect one end to your synth’s line-out socket, and the other end to an input on your audio interface.
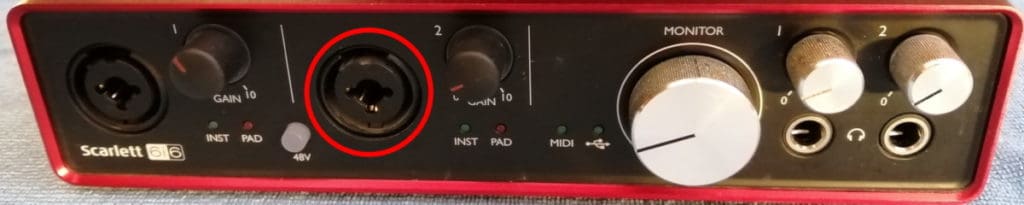
Combined XLR/jack inputs are common on audio interface. These are clever little sockets that can accept both an XLR cable or a ¼” jack cable (but not at the same time!). Don’t be confused into thinking they can only take XLR cables.
At a push you can use the headphone socket on your synth instead of the line-out; just be careful when setting the levels (more on levels later).
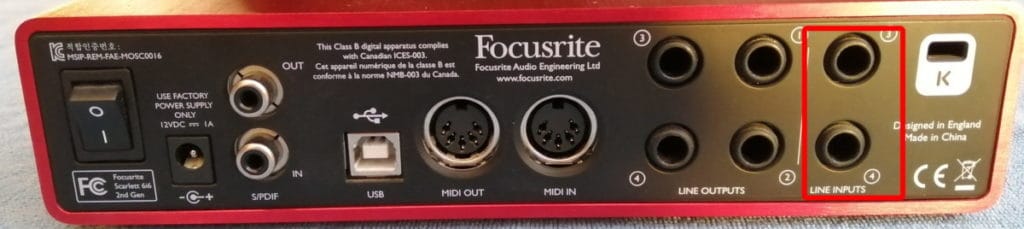
If you wish to record in stereo, you will need to use two inputs of your interface; one for the left signal, one for the right. Some interfaces have stereo line inputs – use these if available. They may be around the back of the interface, like on my Focusrite Scarlett 6i6…
3 Set the level on the audio interface
You should now be able to play your synth, and see an indicator light up on your interface to show it is receiving a signal. This is often a green or yellow indicator.
Your interface will have some way of showing you when the input signal is “clipping“. This is when the sound coming in through the input is too loud, and will cause unpleasant digital distortion – something to be avoided at all costs.
Typically, an LED or indicator on the front of your interface will light up red when clipping is occurring. Play your synth, and observe the indicator as you play. If it goes red, then turn down the gain knob for that input. Keep turning it down until it is no longer turning red at any point during your playing.

4 (Optional) Recording
That’s it as far as the physical connection goes. But assuming you are connecting your synth to the computer to record it, let’s finish the process.
In your DAW, create a track for your synth part. Make sure the track is set to use the input that the synth is plugged into. Enable recording on that track, and enable monitoring so you can hear the sound coming into your DAW. Exactly how to do this will depend on your particular DAW, but there are usually buttons on the track in either the track view or the mixer.
Check the levels again as you did before, but this time monitor the level inside your DAW on the meter for your track. Ideally, you don’t want your level to peak above about -12dB. As before, reduce the gain on the interface if necessary.
You should now be all set up and ready…so press record!
If you are unsure of what exactly a DAW is, I have written a guide to music recording software that explains exactly that. I highly recommend you read it if you are new to DAWs; it clears up some common points of confusion, and you should come back with a clear idea of what a DAW is and what you can do with one.
Connecting a synth to a computer over MIDI
There is an extra potential point of confusion when connecting over MIDI as opposed to audio. With audio, the signal comes out of your synth into your computer. However, with MIDI the signal can actually go in 2 directions, i.e.
- Synth -> computer
- Computer -> synth
So not only can your computer record or use the MIDI data coming out of your synth (synth->computer direction), your computer can also send MIDI data to your synth to play it (computer->synth direction).
The most common of these setups is the synth->computer direction, where perhaps you want to record the synth over MIDI in a DAW, or want to play a virtual software instrument using your synth.
Just as a quick side note; there are several different types of MIDI keyboard – synthesizers, workstations, digital pianos, etc. If you mainly play piano, you may well want to invest in a digital piano to use both as a piano and a MIDI keyboard. If you are in the market for a digital piano, this article looking at how much should you spend on a digital piano should help you choose no matter what your budget is.
The two types of physical MIDI connection
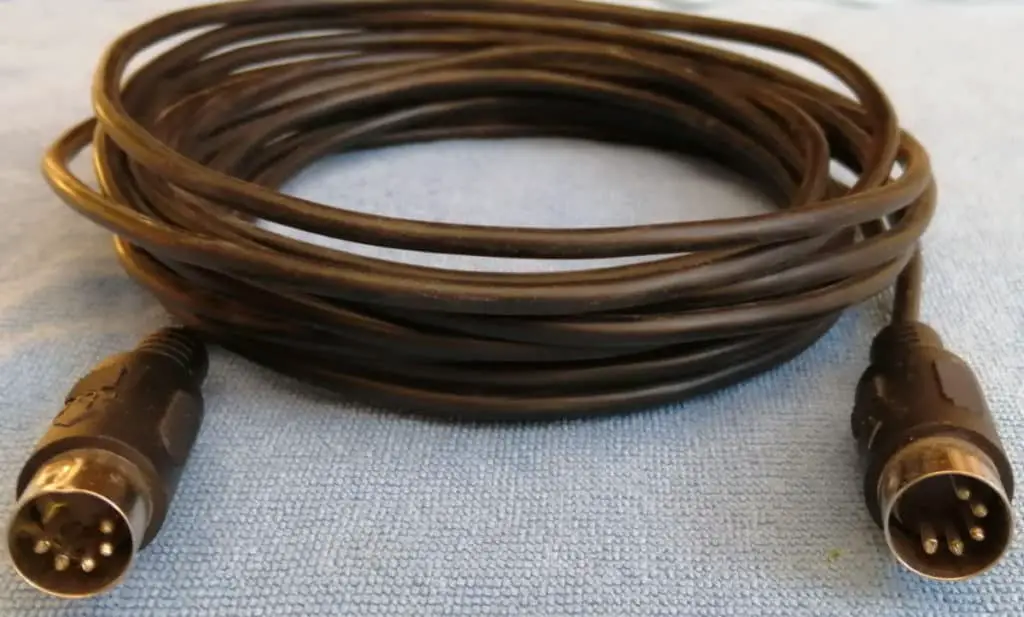
Traditional MIDI 5-pin DIN Connections
Traditional MIDI connections and interfaces use a 5-pin DIN cable. These look like this…
A MIDI interface is required to use this type of connection, either one built into an audio interface or a standalone MIDI interface. Both usually connect to a spare USB port on your computer. So the synth connects to the interface using a MIDI cable, and the interface connects to the computer with a USB cable.
USB MIDI Connections
Some synths can connect straight into your computer, without requiring a separate MIDI interface.
These use a MIDI cable identical to that used to connect a printer to a computer. The “printer” (USB Type B) end plugs into the synth’s USB port, and the “computer” (USB Type A) end into a spare USB port on the computer.
How to connect synth to computer over traditional MIDI
Let’s assume you’re connecting your synth using a traditional 5-pin MIDI cable, and that the reason you are connecting it to the computer is to record it. This means the MIDI data is going in the synth->computer direction.
1 Connect MIDI interface to computer with USB cable
Your standalone MIDI interface or audio interface with built-in MIDI needs connecting to your computer via USB. The appropriate cable should be supplied with the interface. If not, it’s just a standard USB printer cable.
Plug the USB Type B end into the interface’s USB port, and the USB Type A end into a spare USB port on the computer.
2 Connect synth MIDI OUT to interface MIDI IN
It is important to use the correct MIDI ports on both the synth and the interface. There will probably be several MIDI ports on both: MIDI OUT ports send MIDI data out, MIDI IN ports receive MIDI data coming in. There are also MIDI THRU ports, but they are beyond the scope of this article.
For this application, we need to connect the MIDI OUT of the synth to the MIDI IN of the interface with a standard 5-pin DIN MIDI cable. This makes sense when you think about it; data comes OUT of the synth to go IN to the computer to get recorded.

3 (Optional) Recording
That’s the physical connection done. Let’s finish the process by setting up recording MIDI in our DAW software.
Create a track for your synth part, then enable recording and enable monitoring for that track. Select the correct MIDI input channel for the track that corresponds to the one your synth is sending data on.
You should now be good to go… press record!
If you are new to DAW software and wondering what exactly a track is, I have written an article explaining exactly what tracks are and how to use them. It should be of great help to clear up any confusion you may have.
Connecting synth to computer to play virtual instruments
The physical connection for playing a software virtual instrument running inside your computer is exactly the same as for recording.
If your virtual instrument is running as a plugin inside a DAW, just add the instrument to the track in inside the DAW. It you are playing a standalone virtual instrument, just make sure you configure the MIDI settings inside it to use the MIDI input and channel that your synth is using.
Connecting so computer can play the synth
Finally, let’s cover connecting the synth to the computer with the MIDI data going in the other direction i.e. computer->synth.
Why would you do this?
Perhaps your synth has a particular sound in it that you really like that you want in your song, that cannot be accurately replicated by a software virtual instrument. Or maybe you have a recorded MIDI backing track, and you want the computer to play it on the synth as part of a live performance.
Whatever your reasons, the important point to remember here is that the MIDI OUT on the interface needs to connect to the MIDI IN on the synth. Think about the flow of the data; your computer is effectively playing your synth, so the MIDI instructions need to go OUT of the computer IN to your synth.
Here is some of my favorite home studio gear…
Thanks for reading this article. I hope you found it helpful in your home music-making activities. Here are a few of the tools that I personally use in my home studio. These are affiliate links, so if you decide to use any of them I’ll earn a small commission.
Audio interface: My personal choice for audio interfaces are the Focusrite Scarlett series. I have been using these for years, and they have always given me great-sounding recordings. For a very reasonable price from Amazon you can buy the excellent Focusrite Scarlett 4i4, or if you don’t need MIDI capability the Focusrite Solo is a great choice.
Amp sim: Guitar amplifier simulator software has come on leaps and bounds in recent years, such that I record all my electric guitar parts using amp sims these days. One of the very best is the incredible Amplitube from IK Multimedia, which I have used on many of my songs.
Headphones for recording: My favorite headphones for recording are the Sony MDR-7506s, which I use for monitoring during all my recording sessions. They can also be found in many pro recording studios. Get the Sony MDR-7506 headphones from Amazon here.
General-purpose microphone: You can’t go wrong with a good ol’ Shure SM-57, one of the most versatile and ubiquitous microphones around. I’ve been using one in my home studio for as long as I can remember. Amazon offers the Shure SM-57 for a very competitive price.
To see all of my most up-to-date recommendations, check out this resource I made for you!