How to connect a guitar to a PC – a step-by-step guide
DISCLOSURE: This post contains affiliate links. If you buy through these links, I may earn a small commission.
As a guitar player with a home studio, I have connected my guitar to my PC many times over the years. I have done this for both recording and for practice. It did take me a while, however, to work out how exactly to connect to guitar to a computer, and what the best method is.
To connect a guitar to a PC connect a jack cable from the guitar’s output jack to an input on an audio interface. The audio interface should be connected to the PC via USB or Thunderbolt. Connect headphones or speakers to the audio interface to hear the sound output.
Directly connecting your guitar to your computer is arguably the best way of recording guitar in a home studio today. You can also effectively turn your PC into a guitar amp this way. I have a whole article on using your PC as a guitar amp, which I recommend you read if you are intending to do this.
Read on to learn the equipment you need for connecting your guitar to your PC, the reasons you might want to do this, and for a step-by-step guide to the best method.
If you are interested in checking out the best recording gear such as audio interfaces, studio monitor speakers, microphones, etc., you can find them at Amazon by clicking here.
Equipment needed for connecting a guitar to a PC
This article concentrates on connecting an electric guitar to a PC. For connecting an acoustic guitar, check out my article entitled “How to connect an acoustic guitar to a computer“.
This diagram shows the guitar-to-PC setup we are trying to create…
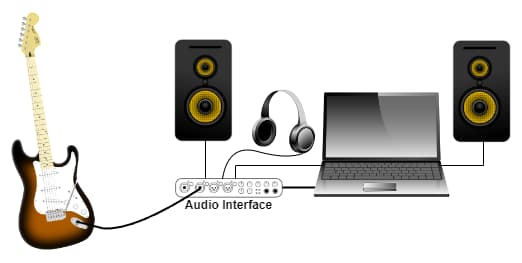
As you can see, there is not much equipment required to connect a guitar to a computer. Here is a list of the equipment needed…
Audio interface
Your guitar will plug into an input on your audio interface, via a standard ¼″ jack cable. The audio interface will plug into your computer, usually via USB or Thunderbolt.
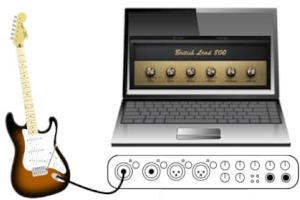
You may be asking why do you need an audio interface when my computer already has an input jack in the form of a mic socket?
You could use that with a suitable ¼″ to mini-jack adaptor. The problem is that those inputs are not designed for high-quality audio or music applications. They will not work with the dedicated high-spec audio drivers that audio interfaces use.
You could probably get it to work to some extent, but the results would be unsatisfactory with unacceptable latency (the time taken between playing and hearing a note) and poor sound quality. If you really want to do this, I have a whole article explaining how to connect a guitar to a computer without using an audio interface.
But for any real practical use, you need an audio interface. Fortunately, there are many excellent audio interfaces on the market that sound great, take up very little space and do not cost much money.
My personal choice is the Focusrite Scarlett series. I have been using these for years, and they give great sounding recordings for not very much money. You can buy the Focusrite Solo from Amazon (affiliate link) for a very reasonable price.
Audio interfaces also come with specialist audio driver software, called ASIO drivers on Windows. These are small software programs that allow your interface to work with your computer to produce high-quality audio with minimal latency. You should install the driver on your computer.
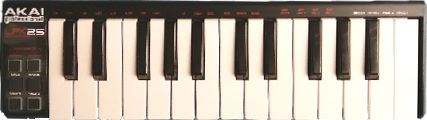
There are specialist audio interfaces, designed specifically for just guitar such as IK Multimedia’s iRig 2. While these are great, I prefer the more general interfaces as I don’t just record guitars. I also record from microphones and keyboards, so I would only recommend these if you are sure you will only ever record guitars.
USB Cable
The audio interface connects to your computer via a USB cable. Usually, this is not something you have to worry about, as the interface will come supplied with a suitable cable. Just make sure you have a free USB port on your computer to plug the audio interface into.
Jack cable
Nothing special about this – it’s just a standard jack cable, just like the one you use to plug your guitar into your amp.
PC
It used to be the case that you needed a special music computer that was more powerful than a standard PC. Fortunately, these days any standard off-the-shelf PC bought in the last 5 years or so will be fine. Just make sure it has enough USB ports to plug in an audio interface along with your other peripherals.
Some guitar players are interested in using their computer as a guitar effects processor. If you are one of these guitarists then I have an article just for you – a beginner’s guide to running guitar effects on your computer. It will show you how to set your PC up as an effects unit, exactly what software and hardware you need, and help you avoid some common pitfalls.
Guitar amp sim or DAW software
While software is not strictly necessary to connect your guitar to your PC, I would argue that if you want to do anything useful with it then you need some software.
There are two main types of software that are appropriate here; amp sims and DAWs (Digital Audio Workstations).
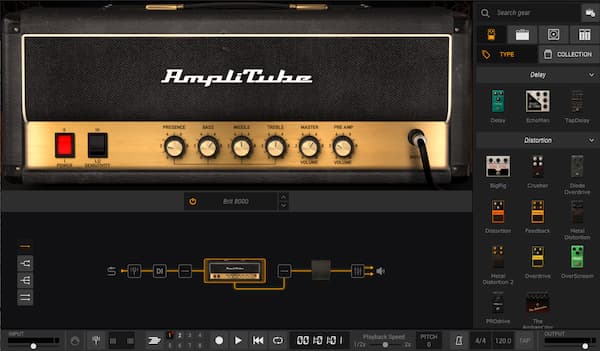
Amp sims simulate guitar amplifiers, and you can think of them as guitar amplifiers in software. There are many amp sims available today, both free and paid. For a great free option, I recommend Amplitube 5 CS.
DAWs are for recording – they are essential highly sophisticated recording studios in software. A DAW is the application you would use to record a song. Like amp sims, there are many free and paid options available. My DAW of choice is Reaper – I wrote an article looking at if Reaper is a good DAW for beginners, which is recommended reading.
You can also combine an amp sim and a DAW, by using the amp sim as a “plugin” inside the DAW. This lets you record a guitar and have it sound like it’s being played through an amp, without actually having to use a real guitar amp.
Confusingly, plugins do not necessarily have to be run inside a DAW. You may want to run them “standalone”, e.g. if you want to use the plugin’s sounds and features without recording. This is often what we want when we connect a guitar to a PC – just to play the guitar through the plugin. I recommend checking out my “how to run VST plugins standalone” article to learn more.
Headphones or speakers
To be able to hear your guitar or recordings you will need either headphones or speakers. These will plug into your audio interface.
For headphones, I highly recommend the AKG K-702 Reference Headphones (affiliate link), which you can get at Amazon for a very reasonable price. These are the headphones that I have been mixing on for years, with great results.
While standard hi-fi stereo speakers are ok, you really need quality studio reference monitor speakers for any serious audio work. I highly recommend the Kali LP-6 Monitor Speakers (affiliate link) available from Amazon for a very competitive price. These are great value speakers, which excellent clarity and detail for their price range. N.B: link is for one speaker.
Step-by-step guide to connecting a guitar to a PC
If you prefer your tutorials in video format, check out this video I made detailing how to connect a guitar to a computer. It’s not quite as detailed as the steps below, but has all the information necessary to get you connected…
For you text lovers, follow these steps to connect your guitar to your PC…
Connect your audio interface to your PC
If it is not already connected, connect the audio interface to a free USB port on your PC using the supplied USB cable.
If your audio interface is new and this is the first time you have used it, you will need to install the supplied software. Audio interfaces often come with a bundle of software, but the important ones to install are…
- ASIO driver – this is important for audio performance, quality and latency
- Utilities – often the driver settings, routing and input type can be set in a supplied software utility
Connect your guitar to your audio interface
Not much to say about this one. Use a standard jack cable, just like the one you use to connect your guitar to your amp. Plug one end into your guitar’s jack output, and plug the other end into a free jack input on your audio interface.
As a quick aside, it’s worth pointing out that connecting your guitar to your PC is just one way of playing your electric guitar without using an amp. There are other ways! To learn all about the different ways to play amp-less, I highly recommend checking out my article “How to play electric guitar without an amp“.
Set the input type
Some audio interface inputs have a hardware or software switch that selects the input type. If this applies to yours, make sure the type is set to “instrument” and not “mic” for the input your guitar is plugged into.
Also, if your input has a selectable “Line” setting, make sure this is switched off or set to whatever the other option is (probably “Instrument”). Line inputs are for instruments that provide line-level outputs such as keyboards or synths.
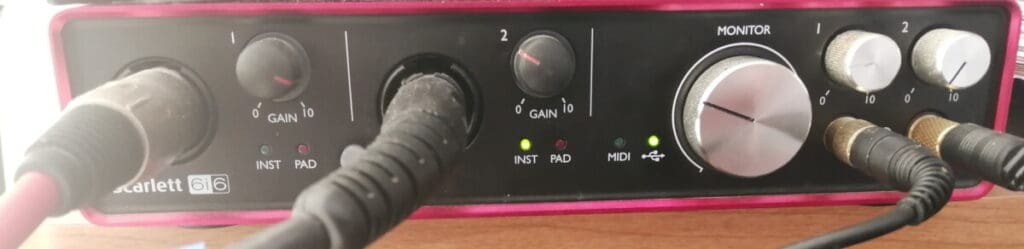
Set the input level on the audio interface
Setting the input level is very important, especially for recording. You want the level to be as high as possible without “clipping”. Clipping will result in unpleasant distortion or other nasty audio artifacts.
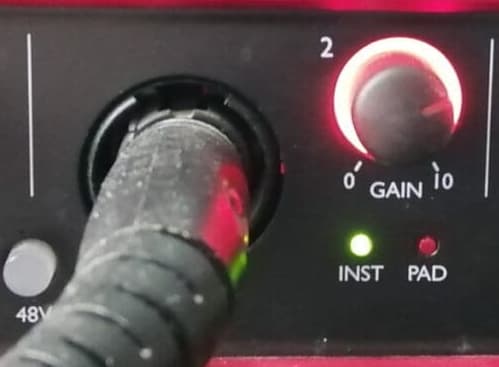
You control the level with the “Gain” control for the input on the audio interface. There will also be a clipping indicator for the input, usually some sort of red LED.
Start playing your guitar, and slowly turn up the gain. You will get to a point where the clipping indicator lights up. When it does, back off the gain a touch. Keep playing and adjusting the gain until the level is as high as it can be without ever clipping.
This is just a brief overview of setting levels. For more detailed coverage of this very important topic, I have a guide to getting guitar recording levels right every time, which is highly recommended reading for anyone doing any sort of guitar recording.
Plug in headphones or speakers into your audio interface
If you want to hear anything, you will need either headphones or speakers connected to your audio interface.
Headphones connect to a standard headphone socket, usually on the front of the audio interface. Connect them just as you would to any consumer audio device such as a smartphone, hi-fi or mp3 player. Use an adaptor as necessary.
Speakers will connect to speaker-out connections which are usually found on the back of the interface. There will be two of them; one for “Left”, one for “Right”. You could use any of the following…
- Powered (active) speakers
- An amplifier connected to standard active speakers
- A PA system (mixer, powered mixer, etc) – this is a typical setup for live performance.
Start your software and configure inputs/outputs
You may have connected everything up, but you are unlikely to hear anything at this point. Your software needs to be running and configured properly to use the connected inputs and outputs
Each DAW and amp sim is slightly different, so I will only talk in general terms here. In the settings of your software, you will probably need to…
- Select the input your guitar is connected to (so the software knows which input to process the sound from)
- Select the output your speakers or headphones are connected to
- You may have to configure the ASIO driver from your software’s settings. This sounds scary but really isn’t. It usually involves just playing your guitar, then selecting a buffer size until it sounds good and latency is acceptable.
I love using amp sims. But they are not for everybody. For that reason, I have a whole article comparing real guitar amps to amp sims. It goes into detail about the differences between real amps and software amps, including the advantages and drawbacks of each. I highly recommend reading it if you are taking your first steps into the world of amp sims.
Set level in the amp sim/DAW
We already set the level going into the input on the audio interface earlier.
This should have done the bulk of the level-setting work for us. However, we also need to be careful of levels inside our software too.
In your amp sim or DAW they may be a setting to control “input gain” or “input level”. Much like with the audio interface input, we want to avoid clipping at all costs.
I suggest for an amp sim, follow a similar process to setting input level for the audio interface.
For a DAW, it’s a little bit different. We want to make absolutely sure to leave enough headroom to turn up the volume as necessary when we mix our guitar recording with other tracks later. A good rule-of-thumb for this is to make sure the input meter averages at about -18dBm, peaking at no more than -12dBm.
Again, I’ll point out this excellent resource for learning how to set guitar levels properly.
Turn up the volume on your headphones/speakers
I’ve quite deliberately left this step till late. While we are plugging equipment in and configuring things, we leave the volume down so as not to cause unpleasant pops. In extreme cases, these can damage your speakers or headphones.
Slowly turn up the volume to the desired level. If you start to hear excessive noise, that’s an indication that something isn’t set up right. Go back and check you have completed the previous steps correctly.
Select a sound
One of the great benefits of amp sims is that they often give you lots of sounds to choose from. It’s like you own hundreds of different guitar amp and pedal board rigs!
So spend a little bit of time selecting a sound. Presets vary in usability – some are excellent and some are dreadful. But you can usually find one that at least makes a good starting point for tweaking to a sound that suits your guitar playing style.
Why connect a guitar to a PC?
Why would we go to all this trouble to connect a guitar to a computer?!
There are other things you can connect your guitar to. For example, you may have a Bluetooth speaker somewhere in your home. I have a whole article dedicated to connecting electric guitars to Bluetooth speakers. Check it out to discover the different ways you can do this, the problems you may encounter and alternative methods for wireless guitar connections.
OK, back to connecting guitars to PCs. The two main reasons for doing this are recording and playing.
Recording
Plugging a guitar directly into a computer’s audio interface is arguably the easiest way to record electric guitars today. The traditional method is mic’ing up a guitar amp, but this is a difficult skill to learn and very easy to mess up. Software amp sims allow us to record direct, at almost silent volume and with much less equipment.
Recording guitars using amp sims is such a game changer for a home studio that I wrote a whole article on it! Check out my complete guide to recording guitar using amp sims. A lot of work has gone into this guide. You’ll learn the full process of recording a track using an amp sim, right from connecting up your guitar to tweaking the recorded sound.
Playing
This covers practice at home, playing along to backing tracks, working through YouTube tutorials, late-night silent practice, etc.
But you can also use a guitar connected to a PC for live performance. Connect the line-out from your audio interface to a PA system’s mixer, and you have all you need for a gig. There are several pro guitar players who actually prefer a setup like this to a traditional guitar amp.
Connecting a guitar amp to a PC
This article has been all about connecting a guitar to a PC.
But there are also applications for connecting a guitar amp to a PC. For more information check out my guide entitled “how to connect a guitar amp to a computer“. You’ll learn several methods, the different applications and how to avoid common pitfalls when connecting a guitar amp to a PC.
Here is some of my favorite home studio gear…
Thanks for reading this article. I hope you found it helpful in your home music-making activities. Here are a few of the tools that I personally use in my home studio. These are affiliate links, so if you decide to use any of them I’ll earn a small commission.
Audio interface: My personal choice for audio interfaces are the Focusrite Scarlett series. I have been using these for years, and they have always given me great-sounding recordings. For a very reasonable price from Amazon you can buy the excellent Focusrite Scarlett 4i4, or if you don’t need MIDI capability the Focusrite Solo is a great choice.
Amp sim: Guitar amplifier simulator software has come on leaps and bounds in recent years, such that I record all my electric guitar parts using amp sims these days. One of the very best is the incredible Amplitube from IK Multimedia, which I have used on many of my songs.
Headphones for recording: My favorite headphones for recording are the Sony MDR-7506s, which I use for monitoring during all my recording sessions. They can also be found in many pro recording studios. Get the Sony MDR-7506 headphones from Amazon here.
General-purpose microphone: You can’t go wrong with a good ol’ Shure SM-57, one of the most versatile and ubiquitous microphones around. I’ve been using one in my home studio for as long as I can remember. Amazon offers the Shure SM-57 for a very competitive price.
To see all of my most up-to-date recommendations, check out this resource I made for you!